
Popular categories
Looking for a yarn?


|
||||||||||
Winter Wheat Jacket |
||||||||||
 |
 |
|||||||||
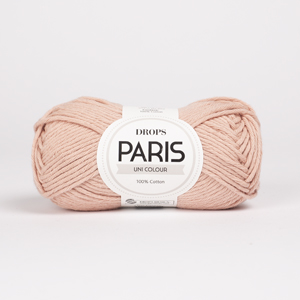
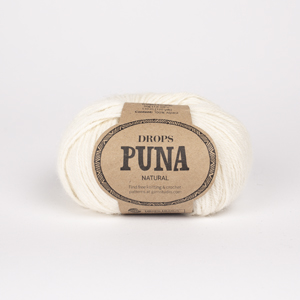
Knitted jacket with raglan in DROPS Puna. The piece is worked top down with textured pattern on the sleeves. Sizes S - XXXL.
DROPS 206-47 |
||||||||||
|
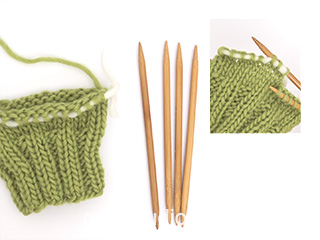
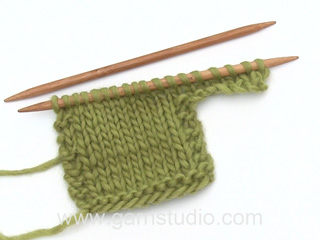
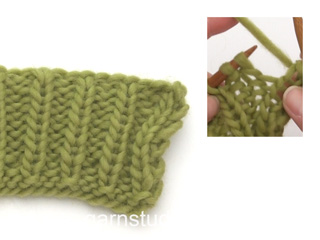
------------------------------------------------------- EXPLANATIONS FOR THE PATTERN: ------------------------------------------------------- RIDGE/GARTER STITCH (worked back and forth): Knit all rows. 1 ridge in height = Knit 2 rows. PATTERN: See diagrams A.1 to A.3. The diagrams show all rows in the pattern seen from the right side. INCREASE TIP (evenly spaced): To work out how to increase evenly, count the total number of stitches to be increased over (e.g. 3 stitches) and divide by the number of increases to be made (e.g. 3) = 1. In this example, increase by making 1 yarn over after each stitch. On the next row work the yarn overs twisted to avoid holes. INCREASE SLEEVES: All increases are worked from the right side! Work as far as the mid-stitch on the sleeve (= stitch with marker), * knit 1, make 1 yarn over *, work from *-* a total of 2 times in the same stitch, knit 1 in the same stitch (= 4 stitches increased in the same stitch). Repeat on the other sleeve. The new stitches are worked into pattern A.2. DECREASE TIP (for sleeves): Decrease in the different sizes as follows: Sizes L and XXXL: Work until there are 2 stitches left before the stitch with the marker, knit 2 together, purl 1 (marker in this stitch), slip 1 stitch as if to knit, knit 1 and pass the slipped stitch over (= 2 stitches decreased). Sizes XL and XXL: Work until there are 3 stitches left before the stitch with the marker, knit 2 together, knit 3 (marker in the middle stitch of these 3), slip 1 stitch as if to knit, knit 1 and pass the slipped stitch over (= 2 stitches decreased). BUTTONHOLES: Work buttonholes on the right band (when the garment is worn). Work from the right side when there are 3 stitches left on the row as follows: Make 1 yarn over, knit 2 together and knit 1. On the next row (wrong side), knit the yarn over to leave a hole. The first buttonhole is worked when the rib on the neck measures approx. 1½-2 cm = ½"-¾". Then work the other 5-5-5-5-5-5 buttonholes with approx. 8½-9-9-9½-10-10 cm = 3¼"-3½"-3½"-3¾"-4"-4" between each one. ------------------------------------------------------- START THE PIECE HERE: ------------------------------------------------------- JACKET – SHORT OVERVIEW OF THE PIECE: The piece is worked back and forth, top down. The sleeves are worked in the round with double pointed needles/short circular needle. Stockinette stitch is worked on the front and back pieces, textured pattern on the sleeves. NECK: Cast on 109-117-117-125-125-133 stitches with circular needle size 3 mm = US 2,5 and Puna. Purl 1 row from the wrong side then work rib from the right side as follows: 5 band stitches in GARTER STITCH – read description above, (knit 1 / purl 1) until there are 6 stitches left on the row, knit 1 and finish with 5 band stitches in garter stitch. Continue back and forth like this. Remember BUTTONHOLES on the right band – read description above. When the rib measures approx. 3 cm = 1⅛" – adjust so the next row is from the right side, insert a marker. THE PIECE IS NOW MEASURED FROM HERE! YOKE: Change to circular needle size 4.5 mm = US 7 and work the next row as follows: 5 band stitches in garter stitch, knit the next 3-5-5-7-7-9 stitches and increase at the same time 3-1-3-1-4-3 stitches evenly spaced – read INCREASE TIP, work A.1 over the next stitch, insert a marker thread here, (= transition between left front piece and left sleeve), work A.2 over the next 40 stitches, work the first stitch in A.2, insert a marker thread here (= transition between left sleeve and back piece), A.3 over the next stitch, knit the next 7-11-11-15-15-19 stitches and increase at the same time increase 7-4-7-3-9-7 stitches evenly spaced, A.1 over the next stitch, insert a marker thread here (= transition between back piece and right sleeve), work A.2 over the next 40 stitches, work the first stitch in A.2, insert a marker thread here (= transition between right sleeve and right front piece), work A.3 over the next stitch, knit the next 3-5-5-7-7-9 stitches and increase at the same time 3-1-3-1-4-3 stitches evenly spaced, 5 band stitches in garter stitch = 126-127-134-134-146-150 stitches on the needle. There is now 1 marker thread in each transition between body and sleeves (= 4 marker threads). Insert 1 marker in the mid-stitch on each sleeve (= knitted stitch). REMEMBER THE KNITTING GAUGE! Continue back and forth with pattern A.2 between the marker threads on the sleeve, with 5 band stitches in garter stitch on each side towards mid front and A.1/A.3 + stockinette stitch on the remaining stitches on the front and back pieces – AT THE SAME TIME on the next row from the right side (row 3 in A.1/A.3) start INCREASE SLEEVES – read description above (= 4 stitches increased on each sleeve). Increase like this every 8th-8th-6th-6th-4th-4th row a total of 6-7-10-11-13-14 times. When A.1 and A.3 have been completed in height continue to repeat towards the raglan-lines 7-8-9-10-11-12 more times (a total of 8-9-10-11-12-13 times), then work the first 3-3-1-1-0-0 rows in the diagrams. When all the increases to sleeves and front and back pieces are finished there are 310-335-374-398-438-466 stitches on the needle (increased 24-28-40-44-52-56 stitches on each sleeve and 35-39-41-45-48-52 stitches on each side of the back piece and the one side of the front pieces). The piece now measures approx. 20-22-24-26-28-30 cm = 8"-8¾"-9½"-10¼"-11"-11¾" from the marker on the neck. If the piece is shorter than this continue working to the right length. The next row from the wrong side is worked as follows: Work the first 47-51-55-59-65-70 stitches (= right front piece), place the next 65-69-81-85-93-97 stitches on 1 thread for sleeve and cast on 9-9-9-11-11-13 new stitches on the needle (= in side under sleeve), work the next 86-95-102-110-122-132 stitches (= back piece), place the next 65-69-81-85-93-97 stitches on 1 thread for sleeve and cast on 9-9-9-11-11-13 new stitches on the needle (= in side under sleeve) and work the remaining 47-51-55-59-65-70 stitches (= left front piece). Body and sleeves are finished separately. THE PIECE IS NOW MEASURED FROM HERE! BODY: There are 198-215-230-250-274-298 stitches on the body. Continue back and forth with stockinette stitch and 5 band stitches in garter stitch on each side. When the piece measures 21 cm = 8¼" increase 1-0-1-1-1-1 stitch = 199-215-231-251-275-299 stitches. Work an edge as follows: 5 band stitches in garter stitch, A.2 until there are 6 stitches left on the row, work the first stitch in A.2 and finish with 5 band stitches in garter stitch. Continue back and forth until the edge measures 4 cm = 1½". Bind off with knit over knit and purl over purl. The jacket measures approx. 50-52-54-56-58-60 cm = 19¾"-20½"-21¼"-22"-22¾"-23⅝" from the shoulder down. SLEEVE: Place the 65-69-81-85-93-97 stitches from the thread on the one side of the piece on short circular needle size 4.5 mm = US 7 and knit up 1 stitch in each of the 9-9-9-11-11-13 stitches cast on under the sleeve = 74-78-90-96-104-110 stitches. Work pattern A.2 in the round as before. The pattern should fit on the round. Work as follows in the different sizes: Sizes S, M: Work textured pattern until the sleeve measures 41-39 cm = 16⅛"-15¼" from the division. Bind off with knit over knit and purl over purl. Sizes L, XL, XXL and XXXL: Work textured pattern until the sleeve measures 4 cm = 1½" from the division. Insert a marker in the middle stitch under the sleeve. On the next round begin to decrease under the sleeve – read DECREASE TIP. Decrease like this every 2nd round a total of 4-4-4-4 times = 82-88-96-102 stitches. Continue with textured pattern until the sleeve measures 38-37-36-34 cm = 15"-14½"-14¼"-13⅜". Bind off with knit over knit and purl over purl. Work the other sleeve in the same way. ASSEMBLY: Sew buttons onto left band. |
||||||||||
Diagram explanations |
||||||||||
|
||||||||||

|
||||||||||
|
Have you made this or any other of our designs? Tag your pictures in social media with #dropsdesign so we can see them! Do you need help with this pattern?You'll find tutorial videos, a Comments/Questions area and more by visiting the pattern on garnstudio.com. © 1982-2024 DROPS Design A/S. We reserve all rights. This document, including all its sub-sections, has copyrights. Read more about what you can do with our patterns at the bottom of each pattern on our site. |
||||||||||


With over 40 years in knitting and crochet design, DROPS Design offers one of the most extensive collections of free patterns on the internet - translated to 17 languages. As of today we count 304 catalogs and 11422 patterns - 11417 of which are translated into English (US/in).
We work hard to bring you the best knitting and crochet have to offer, inspiration and advice as well as great quality yarns at incredible prices! Would you like to use our patterns for other than personal use? You can read what you are allowed to do in the Copyright text at the bottom of all our patterns. Happy crafting!
Comments / Questions (31)
Hallo, ik heb nog een vraagje voor model 206-47! Het telpatroon A.1 en A.3 als die zijn afgewerkt, moet ik dan voor de raglan te herhalen gewoon vanonder met het telpatroon terug beginnen: 1 maal meerderen volgende naald niets, dan 2 omslagen maken, volgende naald niets, volgende naald 1 omslag maken?Mvg Suzy
12.09.2023 - 14:39DROPS Design answered:
Dag Suzy,
Ja, je begint dan inderdaad opnieuw met A.1 en A.3 van onder naar boven.
13.09.2023 - 20:39Hallo, ik ben met model 206-47 begonnen! graag wat meer uitleg over het telpatroon: A2 daar zie ik 2 blanco vakjes, is dit 1 rij alles rechts en 1 rij alles averechts voor 1 blanco vakje of is dit 1 vakje per rij? dan 1 bolletje en 1 blanco, is dit 1 averechts en 1rechts volgende rij terug alles rechts voor 1 vakje? Dus is 1 vakje 1rij of 1rij heen en rij terug? Mvg Suzy
12.09.2023 - 14:31DROPS Design answered:
Dag Suzy,
In de telpatronen zijn alle naalden weergegeven. De eerste rij van A.2 is dus recht aan de goede kant. Als je die naald aan de verkeerde kant breit, brei je hem averecht, maar het is 1 naald en geen 2 naalden. De volgende rij is 1 recht, 1 averecht.
13.09.2023 - 20:29Bij de pas staat na Als A.1 en A.3 klaar zijn in de hoogte.... "brei dan de eerste 0 naalden in de telpatronen". Ik maak maat XL. Hoeveel moet ik bij elke A.1 en A.3 nu meerderen?
22.08.2023 - 17:05DROPS Design answered:
Dag Martina,
Er staat 'brei dan de brei dan de eerste 3-3-1-1-0-0 naalden in de telpatronen. Voor maat XL geldt dus dat je na de meerderingen alleen de eerste naald in de telpatronen breit. Daarboven staat hoe vaak je meerdert, in jouw maat is dat voor de mouwen 11 keer in totaal.
28.08.2023 - 07:31Ich verstehe das Strukturmuster A2 nicht. Können sie das bitte erklären?
21.08.2023 - 15:58DROPS Design answered:
Liebe Melanie, A.2 ist ein Rippenmuster: *1 Masche glatt rechts, 1 Masche kraus rechts*, so stricken Sie bei den Hinreihen: 2 Maschen rechts, und bei den Rückreihen wird die glatt rechte Masche links gestrickt und die krausrechte Masche rechts gestrickt. Viel Spaß beim stricken!
22.08.2023 - 09:15Pour les manches : comment faire A2 en rond ? Vous indiquez un nombre de mailles plus important après les diminutions, pourquoi ? Les manches sont encore très larges après ces diminutions, pourquoi ?
03.09.2022 - 08:43DROPS Design answered:
Bonjour Isabelle, tricotez A.2 ainsi en rond: tour 1: 2 m end, tour 2: (1 m end, 1 m env), répétez de (à) et répétez ces 2 tours. On diminue pour les manches seulement en taille L, XL, XXL et XXXL où on va passer de 90-96-104-110 à 82-88-96-102 mailles; en taille S et M, on ne diminue pas sous la manche. Bon tricot!
05.09.2022 - 08:50Yes, thank you so much! Cannot guarantee I won't be asking more as the increases keep coming but I am now looking forward to getting on with it😊
16.05.2022 - 09:36Thank you but I am doing size M. and have the correct number of 127 Sts on the needle. I just want to know - how many Sts on each front (11 or 12?), sleeve (40 or 41?) and back (21 or 20?). Think it must be 41 for the sleeves so the middle one is a K st? Please just tell me the number of Sts in each section. Thanks.
16.05.2022 - 08:57DROPS Design answered:
Dear Deborah, on first row in M (2nd size), you work: 5 front band sts, K5 + inc 1 (= K6), A.1 (= 1 st) , ie 5+5+1+1=12 sts + 1 st increased = 13 sts for front piece; sleeve: 41 sts (A.2 over 40 sts + 1st st in A.2), back piece = A.3 (= 1 st), K11+4 A.1 (1 st) = 1+11+4+1=17+2 sts inc = 18 sts for back piece; right front piece: A.3 (= 1 st), K5+1=6 sts, 5 front band sts = 1+6+5=12 sts + 1 st inc = 13 sts so that you get: 13+41+19+ 41+13=127 sts. Can this help?
16.05.2022 - 09:22Making increases for yoke and dividing for sleeves. I have followed pattern instructions exactly and have the correct number of stitches. Markers on YOs which will be holes for raglans? But 40st on Rsl and 42 on L! 12sts on fronts. 17sts on back + 4 raglan holes = 127. How do I get the correct number of Sts on each sleeve and have holes for raglans in the correct place? I have read and reread the pattern and cannot proceed with purls in correct place for sleeves. Frustrated and confused :(
15.05.2022 - 08:46DROPS Design answered:
Dear Deborah, you increase for the raglan with diagrams A.1 and A.3, ie you work A.1 at the end of left front piece, A.3 at the beg of back piece + A.1 at the end of back piece and A.3 at the beg of right front piece. (Yarn overs are worked twisted to avoid holes). When diagrams are done, repeat them the same way. On first row: 4 sts inc for raglan in A.1/A.3 + inc over front & back pieces (= 3+7+3=13 sts) + the 117 sts cast on = 117+4+13=134 sts in size L. (Increase then on sleeve 4 sts in the middle on top of sleeve.) Hope this can help. Happy knitting!
16.05.2022 - 08:29Hi,I did a size M and got stuck on the yoke part. Could you kindly explain to me what it means by "..when A. 1 & A. 3 have been completed in height continue to repeat towards the raglan-line 8 more times" So I shouldn't do any increase, right? "Then work the first 3 rows in the diagrams" So now I have to start increasing again? Cuz now I have 347 instead of 335. I wonder where I went wrong.
04.04.2022 - 04:08DROPS Design answered:
Dear Lyly, you repeat A.1/A.3 a total of 9 times = 9x4 sts increased in each front piece + the first 3 rows = 3 sts increased in each front piece = 36+3=39 sts have been increased in each front piece and on each side of back piece - you should have increased a total of 28 sts on each sleeve 4 sts increased a total of 7 times). Can this help?
04.04.2022 - 10:34Strikker winter wheat jacket, men forstår ikke hvordan man gjør økningen på ermet. Finnes det en video som viser?
27.03.2022 - 13:27DROPS Design answered:
Hej Mette, du strikker 1 ret, 1 omslag, 1 ret, 1 omslag, 1 ret i samme maske og på denne måde tager du 4 masker ud samtidig, så mønsteret går op :)
30.03.2022 - 14:45