DROPS Safran uni colour 100% Cotton |
2.05 $ /50g |
Order |
Clicking the ORDER button will redirect you to Wool Warehouse Direct Ltd website
The yarn cost is calculated from the pattern’s smallest size and the yarn’s cheapest product type. Looking for an even better price? You might find it on the DROPS Deals!
-------------------------------------------------------
Alternative Yarn – See how to change yarns here
Yarn Groups A to F – Use the same pattern and change the yarn here
Yarn usage using an alternative yarn – Use our yarn converter here
-------------------------------------------------------
DROPS Safran uni colour 100% Cotton 2.05 $ /50g Order |
Clicking the ORDER button will redirect you to Wool Warehouse Direct Ltd website
The yarn cost is calculated from the pattern’s smallest size and the yarn’s cheapest product type. Looking for an even better price? You might find it on the DROPS Deals!
Each of our patterns has specific tutorial videos to help you.
These step-by-step tutorials might also help you:
Why is the knitting/crochet tension so important?
Knitting tension is what determines the final measurements of your work, and is usually measured per 10 x 10 cm. It is provided like so: number of stitches in width x number of rows in height - eg: 19 stitches x 26 rows = 10 x 10 cm.
The knitting tension is very individual; some people knit/crochet loosely while others work tightly. You adjust the knitting tension with the needle size, which is why the suggested needle size only serve as a guide! You need to adjust this (up or down) to ensure that YOUR knitting tension matches the knitting tension provided in the pattern. If you work with a different knitting tension than provided you will have a different yarn consumption, and your work will have different measurements than what the pattern suggests.
The knitting tension also determines which yarns can replace each other. As long as you achieve the same knitting tension you can replace one yarn with another.
See DROPS lesson: How to measure your tension/gauge
See DROPS video: How to make a gauge tension swatch
How do I know how many balls of yarn I need?
The required amount of yarn is provided in grams, eg: 450 g. To calculate how many balls you’ll need you first need to know how many grams are in 1 ball (25g, 50g or 100g). This information is available if you click on the individual yarn quality on our pages. Divide the amount required with the amount of each ball. For example, if each ball is 50g (the most common amount), the calculation will be as follows: 450 / 50 = 9 balls.
Can I use a different yarn than what the pattern suggests?
The important thing when changing from one yarn to another is that the knitting/crochet tension remains the same. This is so that the measurements of the finished piece will be the same as on the sketch provided. It is easier to achieve the same knitting tension using yarns from the same yarn group. It is also possible to work with multiple strands of a thinner yarn to achieve the knitting tension of a thicker one. Please try our yarn converter. We recommend you to always work a test swatch.
Please NOTE: when changing yarn the garment might have a different look and feel to the garment in the photo, due to individual properties and qualities of each yarn.
See DROPS lesson: Can I use a different yarn than the one mentioned in the pattern?
What are the yarn groups?
All our yarns are categorised into yarn groups (from A to F) according to thickness and knitting tension – group A contains the thinnest yarns and group F the thickest. This makes it easier for you to find alternative yarns to our patterns, should you wish to switch yarn. All yarns within the same group have a similar knitting tension and can easily replace each other. However, different yarn qualities have different structures and properties which will give the finished work a unique look and feel.
How do I use the yarn converter?
At the top of all our patterns you’ll find a link to our yarn converter, which is a helpful tool should you wish to use a different yarn than suggested. By filling in the yarn quality you wish to replace, the amount (in your size) and number of strands, the converter will present good alternative yarns with the same knitting tension. Additionally it will tell you how much you’ll require in the new qualities and whether you’ll need to work with multiple strands. Most skeins are 50g (some are 25g or 100g).
If the pattern is worked with multiple colours, every colour will have to be converted separately. Similarly, if the pattern is worked with several strands of different yarns (for example 1 strand Alpaca and 1 strand Kid-Silk) you will have to find alternatives for each, individually.
Why do you show discontinued yarns in the patterns?
Since different yarns have different qualities and textures we have chosen to keep the original yarn in our patterns. However, you can easily find options among our available qualities by using our yarn converter, or simply pick a yarn from the same yarn group.
It is possible that some retailers still have discontinued yarns in stock, or that someone has a few skeins at home that they would like to find patterns for.
The yarn converter will provide both alternative yarn as well as required amount in the new quality.
What size should I knit?
If you think it's hard to decide what size to make, it can be a good idea to measure a garment you own already and like the size of. Then you can pick the size by comparing those measures with the ones available in the pattern's size chart.
You'll find the size chart at the bottom of the pattern.
See DROPS lesson: How to read size chart
Why do I get the wrong knitting tension with the suggested needle size?
The needle size provided in the pattern serves only as a guide, the important thing is to follow the knitting tension. And since knitting tension is very individual, you will have to adjust the needle size to ensure that YOUR tension is the same as in the pattern – maybe you’ll have to adjust 1, or even 2 needle sizes, up or down to achieve the correct tension. For this, we recommend that you work test swatches.
Should you work with a different knitting tension than the one provided, the measurements of the finished garment might deviate from the measurement sketch.
See DROPS lesson: How to measure your tension/gauge
See DROPS video: How to make a gauge tension swatch
Why is the pattern worked top-down?
Working a garment top-down provides more flexibility and room for personal adjustment. For example it is easier to try the garment on while working, as well as making adjustments to length of yoke and shoulder caps.
The instructions are carefully explaining every step, in the correct order. Diagrams are adjusted to the knitting direction and are worked as usual.
How do I work according to a knitting diagram?
The diagram depicts all rows/rounds, and every stitch seen from the right side. It is read from bottom to top, from right to left. 1 square = 1 stitch.
When working back and forth, every other row is worked from the right side and every other row is worked from the wrong side. When working from the wrong side, the diagram will have to be worked reversed: from left to right, knit stitches are purled, purl stitches are knit etc.
When working in the round every round is worked from the right side and the diagram are worked from right to left on all rounds.
See DROPS lesson: How to read knitting diagrams
How do I work according to a crochet diagram?
The diagram depicts all rows/rounds, and every stitch seen from the right side. It is worked from bottom to top, from right to left.
When working back and forth every other row is worked from the right side: from right to left and every other row is worked from the wrong side: from left to right.
When working in the round, every row in the diagram are worked from the right side, from right to left.
When working a circular diagram you start in the middle and work your way outwards, counter clockwise, row by row.
The rows usually start with a given number of chain stitches (equivalent to the height of the following stitch), this will either be depicted in the diagram or explained in the pattern.
See DROPS lesson: How to read crochet diagrams
How do I work several diagrams simultaneously on the same row/round?
Instructions for working several diagrams after each other on the same row/round, will often be written like so: “work A.1, A.2, A.3 a total of 0-0-2-3-4 times". This means you work A.1 once, then A.2 is worked once, and A.3 is repeated (in width) the number of times provided for your size – in this case like so: S = 0 times, M = 0 times, L=2 times, XL= 3 times and XXL = 4 times.
The diagrams are worked as usual: begin with the first row in A.1, then work the first row in A.2 etc.
See DROPS lesson: How to read knitting diagrams
See DROPS lesson: How to read crochet diagrams
Why are the sleeves shorter in larger sizes?
The total width of the garment (from wrist-to-wrist) will be larger in the larger sizes, despite the actual sleeves being shorter. The larger sizes have longer sleeve caps and wider shoulders, so there will be a good fit in all sizes.
Where on the garment is the length measured?
The measurement sketch/schematic drawing provides information regarding the full length of the garment. If it’s a jumper or a jacket the length is measured from the highest point on the shoulder (usually closest to the neckline), and straight down to the bottom of the garment. It is NOT measured from the tip of shoulder. Similarly, the length of yoke is measured from the highest point on the shoulder and down to where yoke is split into body and sleeves.
See DROPS lesson: How to read a schematic drawing
What is a repeat?
Diagrams are often repeated on the round or in height. 1 repeat is the diagram the way it appears in the pattern. If it says to work 5 repeats of A.1 in the round, then you work A.1 a total of 5 times after/next to each other in the round. If it says to work 2 repeats of A.1 vertically/in height you work the entire diagram once, then begin again at the start and work the entire diagram one more time.
Why does the piece start with more chain stitches than it’s worked with?
Chain stitches are slightly narrower than other stitches and to avoid working the cast-on edge too tight, we simply chain more stitches to begin with. The stitch count will be adjusted on the following row to fit the pattern and measurement sketch.
Why increase before the rib edge when the piece is worked top-down?
The rib edge is more elastic and will contract slightly compared to, for example, stocking stitch. By increasing before the rib edge, you avoid a visible difference in width between the rib edge and the rest of the body.
Why increase in the cast-off edge?
It’s very easy to cast off too tightly, and by making yarn overs while casting off (and simultaneously casting these off) you avoid a too tight cast off edge.
See DROPS video: How to bind off with yarn overs (yo)
How do I increase/decrease on every 3rd and 4th row/round alternately?
To achieve an even increase (or decrease) you can increase on, for example: every 3rd and 4th row alternately, like so: work 2 rows and increase on the 3rd row, work 3 rows and increase on the 4th. Repeat this until the increase is complete.
See DROPS lesson: Increase or decrease 1 st on every 3rd and 4th row alternately
How can I work a jacket in the round instead of back and forth?
Should you prefer to work in the round instead of back and forth, you may of course adjust the pattern. You’ll need to add steeks mid-front (usually 5 stitches), and follow the instructions. When you would normally turn and work from the wrong side, simply work across the steek and continue in the round. At the end you’ll cut the piece open, pick up stitches to work bands, and cover the cut edges.
See DROPS video: How to knit steeks and cut open
Can I work a jumper back and forth instead of in the round?
Should you prefer to work back and forth instead of in the round, you may of course adjust the pattern so you work the pieces separately and then assemble them at the end. Divide the stitches for the body in 2, add 1 edge stitch in each side (for sewing) and work the front and back pieces separately.
See DROPS lesson: Can I adapt a pattern for circular needles into straight needles?
Why is the pattern slightly different than what I see in the photo?
Pattern repeats can vary slightly in the different sizes, in order to get the correct proportions. If you’re not working the exact same size as the garment in the photo, yours might deviate slightly. This has been carefully developed and adjusted so that the complete impression of the garment is the same in all sizes.
Make sure to follow instructions and diagrams for your size!
How do I make a women’s size garment into a men’s size one?
If you have found a pattern you like which is available in women’s size it’s not very difficult to convert it to men’s size. The biggest difference will be the length of sleeves and body. Start working on the women size that you think would fit across the chest. The additional length will be worked right before you cast off for the armhole/sleeve cap. If the pattern is worked top-down you can add the length right after the armhole or before the first decrease on sleeve.
Regarding additional yarn amount, this will depend on how much length you add, but it is better with a skein too many than too few.
How do I prevent a hairy garment from shedding?
All yarns will have excess fibres (from production) that might come off as lint or shedding. Brushed yarns (ie hairier yarns) have more of these loose, excess fibres, causing more shedding.
Shedding also depends on what is worn under or over the garment, and whether this pulls at the yarn fibres. It’s therefore not possible to guarantee that there will be no shedding
Below are some tips on how to get the best result when working with hairier yarns:
1. When the garment is finished (before you wash it) shake it vigorously so the looser hairs come off. NOTE: do NOT use a lint roller, brush or any method that pulls at the yarn.
2. Place the garment in a plastic bag and put it in your freezer - the temperature will cause the fibres to become less attached to each other, and excess fibres will come off easier.
3. Leave in the freezer for a few hours before taking it out and shaking it again.
4. Wash the garment according to the instructions on the yarn label.
Why does my garment pill?
Pilling is a natural process that happens to even the most exclusive of fibers. It's a natural sign of wear and tear that is hard to avoid, and that is most visible in high friction areas of your garment like a sweater's arms and cuffs.
You can make your garment look as new by removing the pilling, using a fabric comb or a pill/lint remover.
Horton |
|
|
|
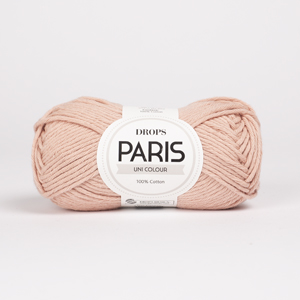
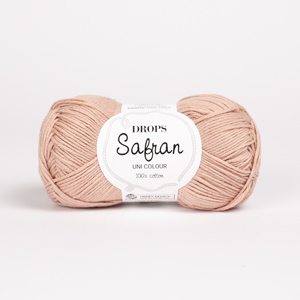
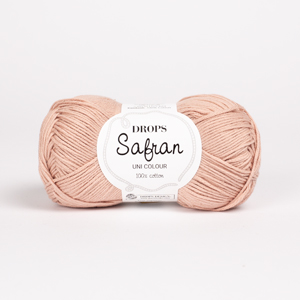
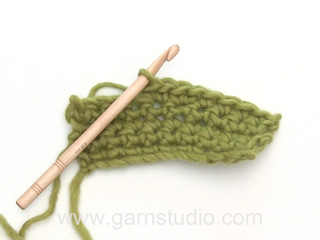
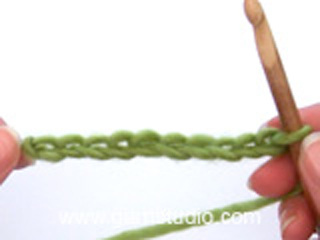
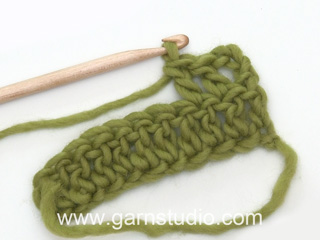
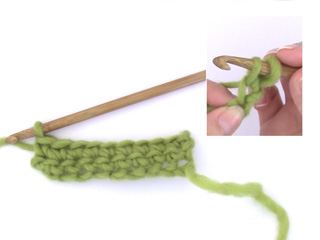
Crochet elephant in DROPS Safran or DROPS Paris
DROPS Children 24-9 |
|
FILLING TIP: Gradually fill some poly stuffing in the animal when working. CROCHET TIP: Beg every sc round with 1 ch (this does not replace first sc) and finish round with 1 sl st in first sc from beg of round. Turn every sc row with 1 ch - this ch does not replace first sc on row. DECREASE TIP: SC: Insert hook in first st and pull thread through, insert hook in next st and pull thread through, make 1 YO and pull thread through all 3 sts on hook. DC: Work 1 dc in next st but wait with last pull through, work next dc the same way. Make 1 YO and pull thread through all sts on hook. ---------------------------------------------------------- SMALL ELEPHANT: Piece is worked from back of body up to and with head and finally the trunk. Then work ears, legs and tail and fasten at the end. READ FILLING TIP! BODY, HEAD AND TRUNK: Work 4 ch with gray on hook size 3 mm / C and form a ring with 1 sl st in first ch. READ CROCHET TIP! ROUND 1: Work 6 sc in ch-ring - round beg mid under on elephant. ROUND 2: Work 2 sc in every sc = 12 sc. ROUND 3: Work * 1 sc in first sc, 2 sc in next sc *, repeat from *-* the entire round = 18 sc. ROUND 4: Work * 1 sc in each of the first 2 sc, 2 sc in next sc *, repeat from *-* the entire round = 24 sc. ROUND 5: Work * 1 sc in each of the first 3 sc, 2 sc in next sc *, repeat from *-* the entire round = 30 sc. ROUND 6-17: Work 1 sc in every sc. ROUND 18: Work the first 4 sc tog 2 by 2 – SEE DECREASE TIP, then work 1 sc in each of the next 22 sc, then work the last 4 sc tog 2 by 2 = 26 sc. ROUND 19: Work the first 4 sc tog 2 by 2, then work 1 sc in each of the next 18 sc, then work the last 4 sc tog 2 by 2 = 22 sc. ROUND 20: Work 1 sc in each of the first 20 sc, turn with ch 1, then work back and forth in one for head. ROW 21 (WS): Skip the first 2 sc, work 1 sc in each of the next 15 sc, turn with 1 ch. ROW 22 (RS): Skip the first 2 sc, work 1 sc in each of the next 12 sc, turn with 1 ch. ROW 23: Skip the first 2 sc, work 1 sc in each of the next 9 sc, turn with 1 ch. ROW 24: Skip the first 2 sc, work 1 sc in each of the next 6 sc, turn with 1 ch. ROW 25: Skip the first 2 sc, work 1 sc in each of the next 3 sc, turn with 1 ch. ROUND 26: Now work in the round again - work 26 sc around the entire opening. ROUND 27: Work 1 sc in every sc. ROUND 28: Work 1 sc in every sc while at the same time dec 6 sc evenly = 20 sc. ROUND 29: Work 1 sc in every sc. ROUND 30: Work as 28th round = 14 sc. ROUND 31: Work 1 sc in every sc but work the 2 sc mid on top of head tog = 13 sc. ROUND 32-35: Work every round as 31st round (= 9 sc after 35th round). ROUND 36-38: Work 1 sc in every sc. ROUND 39: Work 1 sc in every sc but work the 2 sc under the trunk tog = 8 sc. ROUND 40-41: Work every round as 39th round (= 6 sc after 41st round). Fasten off (do not tighten tip tog, the trunk should be open mid front). EAR: Make 2 ears in gray and 2 ears in light pink on hook size 4 mm / G/6 as follows: ROW 1: ch 7, turn and work 1 dc in 3rd ch from hook, 1 dc in each of the next 4 ch = 5 dc and 3 ch. ROW 2: ch 3, 1 dc in first dc, 2 dc in next dc, 1 dc in next dc, 2 dc in next dc, 1 dc in last dc = 7 dc and 3 ch. ROW 3: ch 3, 1 dc in first dc, 2 dc in next dc, 1 dc in each of the next 3 dc, 2 dc in next dc, 1 dc in last dc = 9 dc and 3 ch. ROW 4: ch 3, 1 dc in first dc, work 2 dc tog – see DECREASE TIP, 1 dc in each of the next 3 dc, work 2 dc tog, 1 dc in last dc = 7 dc and 3 ch. ROW 5: ch 3, 1 dc in first dc, work 2 dc tog, 1 dc in next dc, work 2 dc tog, 1 dc in last dc = 5 dc and 3 ch. ROUND 6: Work sc around the entire ear, do not turn piece. Beg with 1 ch and 2 sc in outermost dc from previous row, * 1 sc between next row, 2 sc in outermost dc or 3 ch from next row *, repeat from *-* 3 more times, ch 1, 1 sc in each of the next 4 dc, ch 1, 2 sc in outermost dc from next row, repeat from *-* 4 times, ch 1, 1 sc in each of the next 4 dc and finish with 1 sl st in first ch from beg of round. Place the ears towards each other with gray on top and pink under. Work them tog with gray as follows: 1 sl st in every sc on round, work through both layers but work only in back loop of sts on the top ears and only in front loop of sts on the ear behind. Sew ears to each side of head, 1st round = top of ear. LEG: Ch 4 with gray and form a ring with 1 sl st in first ch. ROUND 1: 6 sc in ch-ring. ROUND 2: 2 sc in every sc = 12 sc. ROUND 3-7: 1 sc in every sc. Fasten off. Work a total of 4 legs like this. Fill some poly stuffing in them and sew them to the underside of body. TAIL: Ch 7 with gray, then work 3 hdc in 2nd ch from hook, then 1 sl st in each of the last ch 5, fasten off and sew the tail to the back of body so that it hangs down. IVORY: Ch 4 with off white, turn and work 1 sl st in 2nd ch from hook, then 1 sc in each of the last 2 ch. Fasten off. Work another ivory and sew them on each side of trunk. Embroider eyes and mouth with black. ---------------------------------------------------------- LARGE ELEPHANT: Work as small elephant, but on hook size 4 mm/G with Paris. Replace medium grey with light light pink and replace light pink with shocking pink. |
|
Have you made this or any other of our designs? Tag your pictures in social media with #dropsdesign so we can see them! Do you need help with this pattern?You'll find tutorial videos, a Comments/Questions area and more by visiting the pattern on garnstudio.com. © 1982-2024 DROPS Design A/S. We reserve all rights. This document, including all its sub-sections, has copyrights. Read more about what you can do with our patterns at the bottom of each pattern on our site. |
With over 40 years in knitting and crochet design, DROPS Design offers one of the most extensive collections of free patterns on the internet - translated to 17 languages. As of today we count 304 catalogs and 11422 patterns - 11417 of which are translated into English (US/in).
We work hard to bring you the best knitting and crochet have to offer, inspiration and advice as well as great quality yarns at incredible prices! Would you like to use our patterns for other than personal use? You can read what you are allowed to do in the Copyright text at the bottom of all our patterns. Happy crafting!
Comments / Questions (7)
Kerstin Pauly wrote:
Ich bitte um Erlaubnis a) die Anleitung für die Gruppe Nadelspiel Krefeld-Linn mehrfach zu drucken b) die Produkte auf jedem Wege uz Gunsten des Krefelder Zoos zu verkaufen c) auf die Nennung der Quelle beim Tier zu verzichten d) jegliche Wolle zu nutzen e) drops in die Sponsor-Liste aufzunehmen (mit Quellenhinweis) Liebe Grüße, Kerstin
06.01.2020 - 15:14DROPS Design answered:
Liebe Frau Pauly, Solange dies nicht als kommerzielles Unternehmen geschieht, sondern eher als Wohltätigkeitslauf, in dem viele Menschen für wohltätige Zwecke häkeln, sollte es kein Problem geben. Viel Spaß beim häkeln!
07.01.2020 - 12:06Maj-Lis Jonsson wrote:
Hej. Jag har testat att göra elefanten Horton, men använt ett annat garn, vilket gick bra, då jag är van virkare. Vad jag inte kan förstå är: Varför måste en virka öronen dubbla? Helt onödigt enligt min mening. tycker oxå att det var en underlig beskrivning ibland & det gjorde att min lilla elefant blev lite sned, men charmig ändå. Barnbarnet blir nog nöjd.
08.07.2018 - 12:36Sandy wrote:
Hello. I am working on Horton the elephant and 2 spots are confusing to me: row 20 stating 'work back and forth in 'one' for head". Also, row 26 stating "work in the round again". I've looked at the picture of the finished product and but still can't understand going from 3 to 26 stitches without a messed up elephant. Do you by any chance have a video of the row 20 thru 26 process? Thank you for your time and assistance! Sandy
23.09.2016 - 20:30DROPS Design answered:
Dear Sandy, at the end of round 20, do not join with a sl st but turn and work next row from WS (= work now back and forth until you have worked row 25). On round 26 crochet 1 sc in each of the sts on previous row and crochet 1 sc in each of beg/end of previous rows = 26 sc, and finish with 1 sl st in 1st st at beg of round, continue now in the round again. Happy crocheting!
26.09.2016 - 10:08Kirsten Reichel wrote:
Ich kann das Teil fotografieren und zusenden, bitte um Adresse wohin.
26.02.2016 - 17:22DROPS Design answered:
Liebe Kirsten, bitte wenden Sie sich an den DROPS Laden, in dem Sie das Material gekauft haben, dort hilft man Ihnen gerne mit zusätzlichen Erklärungen weiter.
29.02.2016 - 15:43Kirsten Reichel wrote:
Danke für die Antwort. Habe nach Anleitung Körper, Kopf und Rüssel angefangen und am Ende der Beschreibung Kopf und Rüssel fertiggestellt. Das waren die Reihen 1-41. Nun fehlt mir die Anleitung für den Körperteil (das ist der linke Teil der Elefantenabbildung an dem die Füße angenäht werden. Diese finde ich aber nicht. Was soll ich machen? MfG Kirsten
26.02.2016 - 16:46Kirsten Reichel wrote:
Sehr geehrte Damen und Herren, ich habe bereits Kopf, Ohren und Beine fertiggestellt, nun vermisse ich bei der Anleitung leider die Beschreibung für den Körper. Können Sie mir irgendwie weiterhelfen??? Ich wäre Ihnen sehr dankbar und verbleibe mit freundlichen Grüßen Kirsten Reichel
25.02.2016 - 18:28DROPS Design answered:
Hallo Frau Reichel, die Anleitung beginnt mit der Beschreibung des Körpers.
26.02.2016 - 16:00Anna Van Der Meulen wrote:
Bij het benodigde materiaal staat alleen naald 3 mm terwijl er in de omschrijving bij het maken van de oren staat dat er een naald nodig is van 4mm. Het zou fijn zijn als deze naald ook bij de benodigde materialen komt te staan.
24.01.2015 - 13:20