-------------------------------------------------------
Alternative Yarn – See how to change yarns here
Yarn Groups A to F – Use the same pattern and change the yarn here
Yarn usage using an alternative yarn – Use our yarn converter here
-------------------------------------------------------
All measurements in charts are in cm.
= K from RS, P from WS | |
= slip 1 st as if to K, K 1, psso | |
= 1 YO between 2 sts | |
= K 2 tog | |
= slip 1 st as if to K, K 2 tog, psso |
Each of our patterns has specific tutorial videos to help you.
These step-by-step tutorials might also help you:
Why is the knitting/crochet tension so important?
Knitting tension is what determines the final measurements of your work, and is usually measured per 10 x 10 cm. It is provided like so: number of stitches in width x number of rows in height - eg: 19 stitches x 26 rows = 10 x 10 cm.
The knitting tension is very individual; some people knit/crochet loosely while others work tightly. You adjust the knitting tension with the needle size, which is why the suggested needle size only serve as a guide! You need to adjust this (up or down) to ensure that YOUR knitting tension matches the knitting tension provided in the pattern. If you work with a different knitting tension than provided you will have a different yarn consumption, and your work will have different measurements than what the pattern suggests.
The knitting tension also determines which yarns can replace each other. As long as you achieve the same knitting tension you can replace one yarn with another.
See DROPS lesson: How to measure your tension/gauge
See DROPS video: How to make a gauge tension swatch
How do I know how many balls of yarn I need?
The required amount of yarn is provided in grams, eg: 450 g. To calculate how many balls you’ll need you first need to know how many grams are in 1 ball (25g, 50g or 100g). This information is available if you click on the individual yarn quality on our pages. Divide the amount required with the amount of each ball. For example, if each ball is 50g (the most common amount), the calculation will be as follows: 450 / 50 = 9 balls.
Can I use a different yarn than what the pattern suggests?
The important thing when changing from one yarn to another is that the knitting/crochet tension remains the same. This is so that the measurements of the finished piece will be the same as on the sketch provided. It is easier to achieve the same knitting tension using yarns from the same yarn group. It is also possible to work with multiple strands of a thinner yarn to achieve the knitting tension of a thicker one. Please try our yarn converter. We recommend you to always work a test swatch.
Please NOTE: when changing yarn the garment might have a different look and feel to the garment in the photo, due to individual properties and qualities of each yarn.
See DROPS lesson: Can I use a different yarn than the one mentioned in the pattern?
What are the yarn groups?
All our yarns are categorised into yarn groups (from A to F) according to thickness and knitting tension – group A contains the thinnest yarns and group F the thickest. This makes it easier for you to find alternative yarns to our patterns, should you wish to switch yarn. All yarns within the same group have a similar knitting tension and can easily replace each other. However, different yarn qualities have different structures and properties which will give the finished work a unique look and feel.
How do I use the yarn converter?
At the top of all our patterns you’ll find a link to our yarn converter, which is a helpful tool should you wish to use a different yarn than suggested. By filling in the yarn quality you wish to replace, the amount (in your size) and number of strands, the converter will present good alternative yarns with the same knitting tension. Additionally it will tell you how much you’ll require in the new qualities and whether you’ll need to work with multiple strands. Most skeins are 50g (some are 25g or 100g).
If the pattern is worked with multiple colours, every colour will have to be converted separately. Similarly, if the pattern is worked with several strands of different yarns (for example 1 strand Alpaca and 1 strand Kid-Silk) you will have to find alternatives for each, individually.
Why do you show discontinued yarns in the patterns?
Since different yarns have different qualities and textures we have chosen to keep the original yarn in our patterns. However, you can easily find options among our available qualities by using our yarn converter, or simply pick a yarn from the same yarn group.
It is possible that some retailers still have discontinued yarns in stock, or that someone has a few skeins at home that they would like to find patterns for.
The yarn converter will provide both alternative yarn as well as required amount in the new quality.
What size should I knit?
If you think it's hard to decide what size to make, it can be a good idea to measure a garment you own already and like the size of. Then you can pick the size by comparing those measures with the ones available in the pattern's size chart.
You'll find the size chart at the bottom of the pattern.
See DROPS lesson: How to read size chart
Why do I get the wrong knitting tension with the suggested needle size?
The needle size provided in the pattern serves only as a guide, the important thing is to follow the knitting tension. And since knitting tension is very individual, you will have to adjust the needle size to ensure that YOUR tension is the same as in the pattern – maybe you’ll have to adjust 1, or even 2 needle sizes, up or down to achieve the correct tension. For this, we recommend that you work test swatches.
Should you work with a different knitting tension than the one provided, the measurements of the finished garment might deviate from the measurement sketch.
See DROPS lesson: How to measure your tension/gauge
See DROPS video: How to make a gauge tension swatch
Why is the pattern worked top-down?
Working a garment top-down provides more flexibility and room for personal adjustment. For example it is easier to try the garment on while working, as well as making adjustments to length of yoke and shoulder caps.
The instructions are carefully explaining every step, in the correct order. Diagrams are adjusted to the knitting direction and are worked as usual.
How do I work according to a knitting diagram?
The diagram depicts all rows/rounds, and every stitch seen from the right side. It is read from bottom to top, from right to left. 1 square = 1 stitch.
When working back and forth, every other row is worked from the right side and every other row is worked from the wrong side. When working from the wrong side, the diagram will have to be worked reversed: from left to right, knit stitches are purled, purl stitches are knit etc.
When working in the round every round is worked from the right side and the diagram are worked from right to left on all rounds.
See DROPS lesson: How to read knitting diagrams
How do I work according to a crochet diagram?
The diagram depicts all rows/rounds, and every stitch seen from the right side. It is worked from bottom to top, from right to left.
When working back and forth every other row is worked from the right side: from right to left and every other row is worked from the wrong side: from left to right.
When working in the round, every row in the diagram are worked from the right side, from right to left.
When working a circular diagram you start in the middle and work your way outwards, counter clockwise, row by row.
The rows usually start with a given number of chain stitches (equivalent to the height of the following stitch), this will either be depicted in the diagram or explained in the pattern.
See DROPS lesson: How to read crochet diagrams
How do I work several diagrams simultaneously on the same row/round?
Instructions for working several diagrams after each other on the same row/round, will often be written like so: “work A.1, A.2, A.3 a total of 0-0-2-3-4 times". This means you work A.1 once, then A.2 is worked once, and A.3 is repeated (in width) the number of times provided for your size – in this case like so: S = 0 times, M = 0 times, L=2 times, XL= 3 times and XXL = 4 times.
The diagrams are worked as usual: begin with the first row in A.1, then work the first row in A.2 etc.
See DROPS lesson: How to read knitting diagrams
See DROPS lesson: How to read crochet diagrams
Why are the sleeves shorter in larger sizes?
The total width of the garment (from wrist-to-wrist) will be larger in the larger sizes, despite the actual sleeves being shorter. The larger sizes have longer sleeve caps and wider shoulders, so there will be a good fit in all sizes.
Where on the garment is the length measured?
The measurement sketch/schematic drawing provides information regarding the full length of the garment. If it’s a jumper or a jacket the length is measured from the highest point on the shoulder (usually closest to the neckline), and straight down to the bottom of the garment. It is NOT measured from the tip of shoulder. Similarly, the length of yoke is measured from the highest point on the shoulder and down to where yoke is split into body and sleeves.
See DROPS lesson: How to read a schematic drawing
What is a repeat?
Diagrams are often repeated on the round or in height. 1 repeat is the diagram the way it appears in the pattern. If it says to work 5 repeats of A.1 in the round, then you work A.1 a total of 5 times after/next to each other in the round. If it says to work 2 repeats of A.1 vertically/in height you work the entire diagram once, then begin again at the start and work the entire diagram one more time.
Why does the piece start with more chain stitches than it’s worked with?
Chain stitches are slightly narrower than other stitches and to avoid working the cast-on edge too tight, we simply chain more stitches to begin with. The stitch count will be adjusted on the following row to fit the pattern and measurement sketch.
Why increase before the rib edge when the piece is worked top-down?
The rib edge is more elastic and will contract slightly compared to, for example, stocking stitch. By increasing before the rib edge, you avoid a visible difference in width between the rib edge and the rest of the body.
Why increase in the cast-off edge?
It’s very easy to cast off too tightly, and by making yarn overs while casting off (and simultaneously casting these off) you avoid a too tight cast off edge.
See DROPS video: How to bind off with yarn overs (yo)
How do I increase/decrease on every 3rd and 4th row/round alternately?
To achieve an even increase (or decrease) you can increase on, for example: every 3rd and 4th row alternately, like so: work 2 rows and increase on the 3rd row, work 3 rows and increase on the 4th. Repeat this until the increase is complete.
See DROPS lesson: Increase or decrease 1 st on every 3rd and 4th row alternately
How can I work a jacket in the round instead of back and forth?
Should you prefer to work in the round instead of back and forth, you may of course adjust the pattern. You’ll need to add steeks mid-front (usually 5 stitches), and follow the instructions. When you would normally turn and work from the wrong side, simply work across the steek and continue in the round. At the end you’ll cut the piece open, pick up stitches to work bands, and cover the cut edges.
See DROPS video: How to knit steeks and cut open
Can I work a jumper back and forth instead of in the round?
Should you prefer to work back and forth instead of in the round, you may of course adjust the pattern so you work the pieces separately and then assemble them at the end. Divide the stitches for the body in 2, add 1 edge stitch in each side (for sewing) and work the front and back pieces separately.
See DROPS lesson: Can I adapt a pattern for circular needles into straight needles?
Why is the pattern slightly different than what I see in the photo?
Pattern repeats can vary slightly in the different sizes, in order to get the correct proportions. If you’re not working the exact same size as the garment in the photo, yours might deviate slightly. This has been carefully developed and adjusted so that the complete impression of the garment is the same in all sizes.
Make sure to follow instructions and diagrams for your size!
How do I make a women’s size garment into a men’s size one?
If you have found a pattern you like which is available in women’s size it’s not very difficult to convert it to men’s size. The biggest difference will be the length of sleeves and body. Start working on the women size that you think would fit across the chest. The additional length will be worked right before you cast off for the armhole/sleeve cap. If the pattern is worked top-down you can add the length right after the armhole or before the first decrease on sleeve.
Regarding additional yarn amount, this will depend on how much length you add, but it is better with a skein too many than too few.
How do I prevent a hairy garment from shedding?
All yarns will have excess fibres (from production) that might come off as lint or shedding. Brushed yarns (ie hairier yarns) have more of these loose, excess fibres, causing more shedding.
Shedding also depends on what is worn under or over the garment, and whether this pulls at the yarn fibres. It’s therefore not possible to guarantee that there will be no shedding
Below are some tips on how to get the best result when working with hairier yarns:
1. When the garment is finished (before you wash it) shake it vigorously so the looser hairs come off. NOTE: do NOT use a lint roller, brush or any method that pulls at the yarn.
2. Place the garment in a plastic bag and put it in your freezer - the temperature will cause the fibres to become less attached to each other, and excess fibres will come off easier.
3. Leave in the freezer for a few hours before taking it out and shaking it again.
4. Wash the garment according to the instructions on the yarn label.
Why does my garment pill?
Pilling is a natural process that happens to even the most exclusive of fibers. It's a natural sign of wear and tear that is hard to avoid, and that is most visible in high friction areas of your garment like a sweater's arms and cuffs.
You can make your garment look as new by removing the pilling, using a fabric comb or a pill/lint remover.
Grace |
||||||||||||||||
|
|
|||||||||||||||
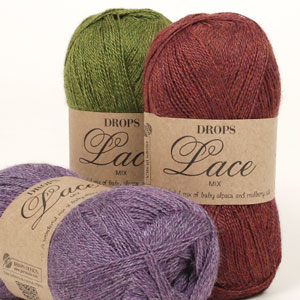
Knitted DROPS scarf with lace pattern in "Lace".
DROPS 137-5 |
||||||||||||||||
KNITTING GAUGE: This garment is to be soaked and blocked/stretched to size afterwards so the knitting gauge is not that important. But to get a sense of whether you are working too loose/tight, work a test on needle size 3.5 mm / US 4 in stockinette st and get approx. 23 sts x 30 rows = 10 x 10 cm / 4" x 4". GARTER ST (back and forth on needle): K all rows. PATTERN: See diagrams M.1 and M.2. Diagrams show all rows in the pattern seen from RS. 1st row = RS. --------------------------------------------------------- SCARF: Cast on 69 sts on needle size 3.5 mm / US 4 with Lace. K 1 row from WS. Work next row as follows: 3 sts in GARTER ST, diagram M.1A 1 time, diagram M.1B 5 times, diagram M.1C 1 time, 3 sts in garter st. Continue like this until M.1 has been worked 2 times vertically. K 4 rows, on last row dec 9 sts evenly = 60 sts. Work next row as follows from RS: 3 sts in garter st, diagram M.2 6 times, 3 sts in garter st. Continue with pattern and 3 sts in garter st in the sides until piece measures approx. 80 cm / 31½" with a light pull, make sure that one full repetition of diagram M.2 has been finished. Now K 4 rows over all sts. Put all sts on a stitch holder. Knit another part the same way. ASSEMBLY: Graft/sew the 2 parts tog st by st. BLOCKING: Place the scarf in lukewarm water until it is soaking wet. Carefully squeeze the water out of the scarf - do not twist the scarf - then roll the scarf in a towel and squeeze to remove more water - the scarf will now only be moist. Place the scarf on a carpet or mattress - carefully stretch it out to size and fasten it with pins. Leave to dry. Repeat the process when the garment has been washed. |
||||||||||||||||
Diagram explanations |
||||||||||||||||
|
||||||||||||||||
Have you made this or any other of our designs? Tag your pictures in social media with #dropsdesign so we can see them! Do you need help with this pattern?You'll find tutorial videos, a Comments/Questions area and more by visiting the pattern on garnstudio.com. © 1982-2024 DROPS Design A/S. We reserve all rights. This document, including all its sub-sections, has copyrights. Read more about what you can do with our patterns at the bottom of each pattern on our site. |
With over 40 years in knitting and crochet design, DROPS Design offers one of the most extensive collections of free patterns on the internet - translated to 17 languages. As of today we count 304 catalogs and 11422 patterns - 11417 of which are translated into English (US/in).
We work hard to bring you the best knitting and crochet have to offer, inspiration and advice as well as great quality yarns at incredible prices! Would you like to use our patterns for other than personal use? You can read what you are allowed to do in the Copyright text at the bottom of all our patterns. Happy crafting!
Comments / Questions (60)
Petra Siersetzki wrote:
Wenn ich das Muster so stricke, dann ist doch in M1A in jeder Reihe 1 M mehr, weil 2 zusammenstricken und 2 Umschläge. In M1C fehlt dafür eine Masche, da kein Umschlag. Lese ich das falsch oder soll sich das verschieben, da ich M1A und M1C doch nur 1x in jeder Reihe stricke?
13.03.2024 - 15:18DROPS Design answered:
Liebe Frau Siersetzki, die letzte Maschen M.1A bei jeder Hin-Reihe gehört zu M.1B, die letzte Masche M.1B gehört zum nächsten M.1B/zu M.1C, beachten Sie, daß die Maschenprobe in jedem Rapport immer stimmt. Viel Spaß beim Stricken!
13.03.2024 - 16:07Shelley wrote:
Can your patterns be translated to American English?
06.08.2021 - 02:26DROPS Design answered:
Dear Shelley, many of our patterns are available in American English (especially all crochet patterns); click on the scroll down menu below the pictures to edit language. Happy knitting!
06.08.2021 - 08:13Sandra Ring wrote:
Liebes Drops Team, vielen Dank für diese schöne Anleitung. Der Schal ist sehr schön geworden, habe ihn in wollweiß gestrickt. Er ist etwa 2 Meter lang da ich fast 1,80m groß bin, gab ich ein paar Reihen hinzu. Das Zusammennähen war neu für mich und gelang nicht ganz perfekt aber für das erste Mal Lace + Ajourstricken bin ich zufrieden. Ganz liebe Grüße nach Norwegen!
09.10.2020 - 16:56Sandra wrote:
Was mache ich bei der Bordüre falsch...bei mir werden es Bögen aber keine Spitzen? Ich habe Maschen angeschlagen und eine Runde rechts zurück gestrickt und dann Maschensätze wie angegeben. Liebe Grüße Sandra Ring
11.09.2020 - 22:11DROPS Design answered:
Liebe Sandra, beim stricken haben Sie nur Wellen, beim Spannen können Sie dann mit der Hilfen von Stecknadeln die Spitze bekommen. Viel Spaß beim stricken!
14.09.2020 - 08:13Gitte wrote:
Som der er skrevet før og jeg nu selv oplever og som garnets beskrivelse siger 23m=10 cm, så giver 69 m 30 cm og ikke 50. Hvorfor skriver I så, at det er 50 cm bredt? Meget smukt mønster i øvrigt :-)
31.01.2020 - 17:59DROPS Design answered:
Hej Gitte, Tørklædet skal strækkes forsigtigt ud i de rigtige mål ifølge opskriften. God fornøjelse!
11.02.2020 - 09:12Jozefien De Bruijn wrote:
Helaas bleef de sjaal toch nog steeds te dun/smal om er echt plezier van te hebben. Gisteren heb ik hem dan maar gevilt: heet water, marseillezeep en langdurig wrijven over bobbeltjesplastic. Daarna nat uitgerekt en gestreken op de hete stand. Het resultaat is nu zeer bevredigend: een heerlijk zachte sjaal, met kantpatroon. Weliswaar wat korter dan het patroon aangaf, maar alleszins bruikbaar.
03.04.2019 - 12:45Jozefien De Bruijn wrote:
Dank je voor de suggestie. Ik ga opnieuw oprekken.
03.02.2019 - 16:58Jozefien De Bruijn wrote:
Ik heb de sjaal niet meer gewassen na de eerste keer. Want ik weet dat na iedere wasbeurt het opspannen herhaald dient te worden. Dat doe ik met mijn driehoekige omslagdoek ook. Alleen al door het dragen wordt de langwerpige sjaal weer veel te smal om goed bruikbaar te zijn. Vandaar mijn vraag of op een dunne lap stof naaien het probleem zou kunnen oplossen.
31.01.2019 - 11:41DROPS Design answered:
Dag Jozefien,
Als je sjaal weer in elkaar trekt, betekent het dat hij nog beter opgespannen moet worden. Zelf gebruik ik hier wel eens het strijkijzer voor, maar dit moet je dan wel echt heel erg voorzichtig doen! Leg de sjaal op de strijkplank op de juiste maat gerekt. Leg er een natte theedoek overheen en dep heel voorzichtig met het strijkijzer over het werk.
Vastnaaien op een dunne stof zou ik niet aanraden, omdat je dan een heel ander effect krijgt, en bovendien zou je hem dan op heel veel plekken vast moeten naaien om opnieuw samentrekken te voorkomen.
03.02.2019 - 12:04Jozefien wrote:
Het is een mooie sjaal geworden. Maar na wassen, oprekken en drogen wordt hij na een paar keer dragen weer een soort heel smal sjaaltje en geen mooie brede sjaal. Heel jammer dus. Kan ik hem op een heel dunne lap stof (zijde ?) naaien om de vorm beter te behouden ?
29.01.2019 - 19:13DROPS Design answered:
Dag Jozefien,
Het opspannen wat je doet nadat je het breiwerk af hebt, moet je na elke wasbeurt weer doen om hem in vorm te krijgen.
30.01.2019 - 16:41Erika Sørensen wrote:
Maskeantal må være forkert. Jeg har strikket dette tørklæde for nogen tid siden og måtte selv regne mig frem til antal af masker i Lace.
03.12.2018 - 11:20DROPS Design answered:
Hei Erika. Maskeantallet stemmer. Om din strikkefasthet stemmer overens med den oppgitte strikkefastheten i glattstrikk ( 23 m x 30 p på 10 x 10 cm. På pinne 3,5) skal det også stemme i mønsterstrikken. Dette arbeidet skal strekkes ut til rikitge mål når det er ferdig, og det vil være smalere mens du arbeider med det. God fornøyelse
05.12.2018 - 11:11