The yarn cost is calculated from the pattern’s smallest size and the yarn’s cheapest product type. Looking for an even better price? You might find it on the DROPS Deals!
-------------------------------------------------------
Alternative Yarn – See how to change yarns here
Yarn Groups A to F – Use the same pattern and change the yarn here
Yarn usage using an alternative yarn – Use our yarn converter here
-------------------------------------------------------
The yarn cost is calculated from the pattern’s smallest size and the yarn’s cheapest product type. Looking for an even better price? You might find it on the DROPS Deals!
This pattern has been corrected. Click here to see the correction/s.
Each of our patterns has specific tutorial videos to help you.
These step-by-step tutorials might also help you:
Why is the knitting/crochet tension so important?
Knitting tension is what determines the final measurements of your work, and is usually measured per 10 x 10 cm. It is provided like so: number of stitches in width x number of rows in height - eg: 19 stitches x 26 rows = 10 x 10 cm.
The knitting tension is very individual; some people knit/crochet loosely while others work tightly. You adjust the knitting tension with the needle size, which is why the suggested needle size only serve as a guide! You need to adjust this (up or down) to ensure that YOUR knitting tension matches the knitting tension provided in the pattern. If you work with a different knitting tension than provided you will have a different yarn consumption, and your work will have different measurements than what the pattern suggests.
The knitting tension also determines which yarns can replace each other. As long as you achieve the same knitting tension you can replace one yarn with another.
See DROPS lesson: How to measure your tension/gauge
See DROPS video: How to make a gauge tension swatch
How do I know how many balls of yarn I need?
The required amount of yarn is provided in grams, eg: 450 g. To calculate how many balls you’ll need you first need to know how many grams are in 1 ball (25g, 50g or 100g). This information is available if you click on the individual yarn quality on our pages. Divide the amount required with the amount of each ball. For example, if each ball is 50g (the most common amount), the calculation will be as follows: 450 / 50 = 9 balls.
Can I use a different yarn than what the pattern suggests?
The important thing when changing from one yarn to another is that the knitting/crochet tension remains the same. This is so that the measurements of the finished piece will be the same as on the sketch provided. It is easier to achieve the same knitting tension using yarns from the same yarn group. It is also possible to work with multiple strands of a thinner yarn to achieve the knitting tension of a thicker one. Please try our yarn converter. We recommend you to always work a test swatch.
Please NOTE: when changing yarn the garment might have a different look and feel to the garment in the photo, due to individual properties and qualities of each yarn.
See DROPS lesson: Can I use a different yarn than the one mentioned in the pattern?
What are the yarn groups?
All our yarns are categorised into yarn groups (from A to F) according to thickness and knitting tension – group A contains the thinnest yarns and group F the thickest. This makes it easier for you to find alternative yarns to our patterns, should you wish to switch yarn. All yarns within the same group have a similar knitting tension and can easily replace each other. However, different yarn qualities have different structures and properties which will give the finished work a unique look and feel.
How do I use the yarn converter?
At the top of all our patterns you’ll find a link to our yarn converter, which is a helpful tool should you wish to use a different yarn than suggested. By filling in the yarn quality you wish to replace, the amount (in your size) and number of strands, the converter will present good alternative yarns with the same knitting tension. Additionally it will tell you how much you’ll require in the new qualities and whether you’ll need to work with multiple strands. Most skeins are 50g (some are 25g or 100g).
If the pattern is worked with multiple colours, every colour will have to be converted separately. Similarly, if the pattern is worked with several strands of different yarns (for example 1 strand Alpaca and 1 strand Kid-Silk) you will have to find alternatives for each, individually.
Why do you show discontinued yarns in the patterns?
Since different yarns have different qualities and textures we have chosen to keep the original yarn in our patterns. However, you can easily find options among our available qualities by using our yarn converter, or simply pick a yarn from the same yarn group.
It is possible that some retailers still have discontinued yarns in stock, or that someone has a few skeins at home that they would like to find patterns for.
The yarn converter will provide both alternative yarn as well as required amount in the new quality.
What size should I knit?
If you think it's hard to decide what size to make, it can be a good idea to measure a garment you own already and like the size of. Then you can pick the size by comparing those measures with the ones available in the pattern's size chart.
You'll find the size chart at the bottom of the pattern.
See DROPS lesson: How to read size chart
Why do I get the wrong knitting tension with the suggested needle size?
The needle size provided in the pattern serves only as a guide, the important thing is to follow the knitting tension. And since knitting tension is very individual, you will have to adjust the needle size to ensure that YOUR tension is the same as in the pattern – maybe you’ll have to adjust 1, or even 2 needle sizes, up or down to achieve the correct tension. For this, we recommend that you work test swatches.
Should you work with a different knitting tension than the one provided, the measurements of the finished garment might deviate from the measurement sketch.
See DROPS lesson: How to measure your tension/gauge
See DROPS video: How to make a gauge tension swatch
Why is the pattern worked top-down?
Working a garment top-down provides more flexibility and room for personal adjustment. For example it is easier to try the garment on while working, as well as making adjustments to length of yoke and shoulder caps.
The instructions are carefully explaining every step, in the correct order. Diagrams are adjusted to the knitting direction and are worked as usual.
How do I work according to a knitting diagram?
The diagram depicts all rows/rounds, and every stitch seen from the right side. It is read from bottom to top, from right to left. 1 square = 1 stitch.
When working back and forth, every other row is worked from the right side and every other row is worked from the wrong side. When working from the wrong side, the diagram will have to be worked reversed: from left to right, knit stitches are purled, purl stitches are knit etc.
When working in the round every round is worked from the right side and the diagram are worked from right to left on all rounds.
See DROPS lesson: How to read knitting diagrams
How do I work according to a crochet diagram?
The diagram depicts all rows/rounds, and every stitch seen from the right side. It is worked from bottom to top, from right to left.
When working back and forth every other row is worked from the right side: from right to left and every other row is worked from the wrong side: from left to right.
When working in the round, every row in the diagram are worked from the right side, from right to left.
When working a circular diagram you start in the middle and work your way outwards, counter clockwise, row by row.
The rows usually start with a given number of chain stitches (equivalent to the height of the following stitch), this will either be depicted in the diagram or explained in the pattern.
See DROPS lesson: How to read crochet diagrams
How do I work several diagrams simultaneously on the same row/round?
Instructions for working several diagrams after each other on the same row/round, will often be written like so: “work A.1, A.2, A.3 a total of 0-0-2-3-4 times". This means you work A.1 once, then A.2 is worked once, and A.3 is repeated (in width) the number of times provided for your size – in this case like so: S = 0 times, M = 0 times, L=2 times, XL= 3 times and XXL = 4 times.
The diagrams are worked as usual: begin with the first row in A.1, then work the first row in A.2 etc.
See DROPS lesson: How to read knitting diagrams
See DROPS lesson: How to read crochet diagrams
Why are the sleeves shorter in larger sizes?
The total width of the garment (from wrist-to-wrist) will be larger in the larger sizes, despite the actual sleeves being shorter. The larger sizes have longer sleeve caps and wider shoulders, so there will be a good fit in all sizes.
Where on the garment is the length measured?
The measurement sketch/schematic drawing provides information regarding the full length of the garment. If it’s a jumper or a jacket the length is measured from the highest point on the shoulder (usually closest to the neckline), and straight down to the bottom of the garment. It is NOT measured from the tip of shoulder. Similarly, the length of yoke is measured from the highest point on the shoulder and down to where yoke is split into body and sleeves.
See DROPS lesson: How to read a schematic drawing
What is a repeat?
Diagrams are often repeated on the round or in height. 1 repeat is the diagram the way it appears in the pattern. If it says to work 5 repeats of A.1 in the round, then you work A.1 a total of 5 times after/next to each other in the round. If it says to work 2 repeats of A.1 vertically/in height you work the entire diagram once, then begin again at the start and work the entire diagram one more time.
Why does the piece start with more chain stitches than it’s worked with?
Chain stitches are slightly narrower than other stitches and to avoid working the cast-on edge too tight, we simply chain more stitches to begin with. The stitch count will be adjusted on the following row to fit the pattern and measurement sketch.
Why increase before the rib edge when the piece is worked top-down?
The rib edge is more elastic and will contract slightly compared to, for example, stocking stitch. By increasing before the rib edge, you avoid a visible difference in width between the rib edge and the rest of the body.
Why increase in the cast-off edge?
It’s very easy to cast off too tightly, and by making yarn overs while casting off (and simultaneously casting these off) you avoid a too tight cast off edge.
See DROPS video: How to bind off with yarn overs (yo)
How do I increase/decrease on every 3rd and 4th row/round alternately?
To achieve an even increase (or decrease) you can increase on, for example: every 3rd and 4th row alternately, like so: work 2 rows and increase on the 3rd row, work 3 rows and increase on the 4th. Repeat this until the increase is complete.
See DROPS lesson: Increase or decrease 1 st on every 3rd and 4th row alternately
How can I work a jacket in the round instead of back and forth?
Should you prefer to work in the round instead of back and forth, you may of course adjust the pattern. You’ll need to add steeks mid-front (usually 5 stitches), and follow the instructions. When you would normally turn and work from the wrong side, simply work across the steek and continue in the round. At the end you’ll cut the piece open, pick up stitches to work bands, and cover the cut edges.
See DROPS video: How to knit steeks and cut open
Can I work a jumper back and forth instead of in the round?
Should you prefer to work back and forth instead of in the round, you may of course adjust the pattern so you work the pieces separately and then assemble them at the end. Divide the stitches for the body in 2, add 1 edge stitch in each side (for sewing) and work the front and back pieces separately.
See DROPS lesson: Can I adapt a pattern for circular needles into straight needles?
Why is the pattern slightly different than what I see in the photo?
Pattern repeats can vary slightly in the different sizes, in order to get the correct proportions. If you’re not working the exact same size as the garment in the photo, yours might deviate slightly. This has been carefully developed and adjusted so that the complete impression of the garment is the same in all sizes.
Make sure to follow instructions and diagrams for your size!
How do I make a women’s size garment into a men’s size one?
If you have found a pattern you like which is available in women’s size it’s not very difficult to convert it to men’s size. The biggest difference will be the length of sleeves and body. Start working on the women size that you think would fit across the chest. The additional length will be worked right before you cast off for the armhole/sleeve cap. If the pattern is worked top-down you can add the length right after the armhole or before the first decrease on sleeve.
Regarding additional yarn amount, this will depend on how much length you add, but it is better with a skein too many than too few.
How do I prevent a hairy garment from shedding?
All yarns will have excess fibres (from production) that might come off as lint or shedding. Brushed yarns (ie hairier yarns) have more of these loose, excess fibres, causing more shedding.
Shedding also depends on what is worn under or over the garment, and whether this pulls at the yarn fibres. It’s therefore not possible to guarantee that there will be no shedding
Below are some tips on how to get the best result when working with hairier yarns:
1. When the garment is finished (before you wash it) shake it vigorously so the looser hairs come off. NOTE: do NOT use a lint roller, brush or any method that pulls at the yarn.
2. Place the garment in a plastic bag and put it in your freezer - the temperature will cause the fibres to become less attached to each other, and excess fibres will come off easier.
3. Leave in the freezer for a few hours before taking it out and shaking it again.
4. Wash the garment according to the instructions on the yarn label.
Why does my garment pill?
Pilling is a natural process that happens to even the most exclusive of fibers. It's a natural sign of wear and tear that is hard to avoid, and that is most visible in high friction areas of your garment like a sweater's arms and cuffs.
You can make your garment look as new by removing the pilling, using a fabric comb or a pill/lint remover.
Lemon Drops |
|
|
|
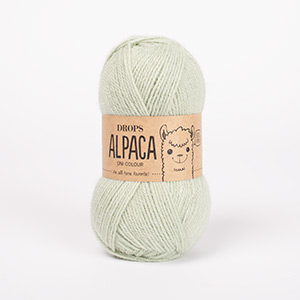
Crochet DROPS socks in ”Alpaca”.
DROPS 120-35 |
|
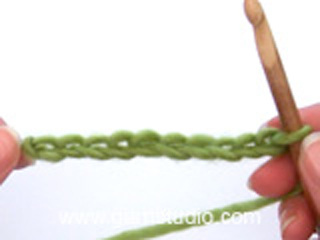
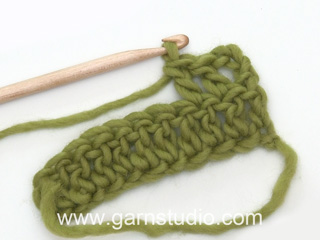
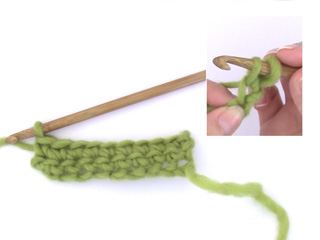
DECREASING TIP: Dec 1 st as follows: Crochet 1 sc/dc but wait with last pull-through (= 2 sts on hook), work next sc/dc and when doing the last pull-through pull thread through all sts on hook – 1 st dec. CROCHET TIP: Replace first sc on round with ch 1. Replace first dc on round with ch 3. Finish each round with 1 sl st. On heel turn each row with ch 1. HEEL DECREASES: ROW 1 (= RS): Crochet 19-20-22 sc, 7-8-8 sc now remain on row, dec 1 sc – SEE DECREASING TIP = 20-21-23 sc, turn piece. ROW 2 (= WS): Crochet 13-13-15 sc, 7-8-8 sc now remain on row, dec 1 sc = 14-14-16 sc, turn piece. ROW 3 (= RS): Crochet 13-13-15 sc, dec 1 sc, turn piece. Repeat row 3 a total of 10-12-12 times, i.e. until all sts on each side of the middle 14-14-16 have been dec. -------------------------------------------------------- -------------------------------------------------------- SOCK: Crochet in the round. Ch 75-80-85 with hook size 2 mm / B/1 and off-white and form a ring with 1 sl st in first ch. Crochet a round as follows: ch 3, then 1 dc in each of the next 3 ch, skip ch 1, * 1 dc in each of the next 4 ch, skip 1 ch *, repeat from *-*, finish with 1 sl st in 3rd ch from beg of round = 60-64-68 dc. Change to wheat and continue as follows: ROUND 1: ch 3 + 1 dc in first dc, skip 1 dc, * 2 dc in next dc, skip 1 dc *, repeat from *-* and finish with 1 sl st in 3rd ch from beg of round = 30-32-34 dc-groups. ROUND 2: ch 3, 2 dc between the first 2 dc-group, * 2 dc between the next 2 dc-groups *, repeat from *-* and finish with 1 dc between the last and the first dc-group (i.e. where the 3 ch were crochet) and 1 sl st in 3rd ch from beg of round. ROUND 3: ch 3, 1 dc between the first 2 dc-groups, * 2 dc between the next 2 dc-groups *, repeat from *-* and finish with 1 sl st in 3rd ch from beg of round. Repeat round 2 and 3 alternately (crocheting round 2 only would cause the piece to twist). REMEMBER THE TENSION/GAUGE! When piece measures approx 14 cm / 5½" crochet sc back and forth on the first 26-28-30 sts on round for heel. Continue until heel measures approx 5-5.5-6 cm / 2"-2¼"-2⅜". Insert a marker – NOW MEASURE PIECE FROM HERE! Now dec for heel – see HEEL DECREASES. After heel dec continue as follows: 1 dc in each of the 14-14-16 sc on heel, 14-15-16 dc along the side of heel, 1 dc in each of the 34-36-38 dc on upper foot and 14-15-16 dc along the other side of heel = 76-80-86 dc on round. Insert a marker each side of the 34-36-38 dc on upper foot. Continue in the round with dc, AT THE SAME TIME dec 1 dc each side of the 34-36-38 dc on upper foot – SEE DECREASING TIP, and repeat the dec on every round a total of 10-10-11 times = 56-60-64 dc. Continue until piece measures 18.5-20.5-23 cm / 7½"-8¼"-9" from marker on heel (= approx 3.5-3.5-4 cm / 1¼"-1¼"-1½" remain). Change to off-white, insert a marker each side with 28-30-32 dc on upper foot and under foot. Continue as follows: 1 round with 1 sc in each dc, then 1 sc in each sc, AT THE SAME TIME dec 1 sc each side of both markers – SEE DECREASING TIP, and repeat the dec on every round a total of 10-11-12 times = 16 sc left. On next round crochet 2 sc tog all the way round. Cut the thread, pull through remaining 8 sc, tighten and fasten. |
|
Have you made this or any other of our designs? Tag your pictures in social media with #dropsdesign so we can see them! Do you need help with this pattern?You'll find tutorial videos, a Comments/Questions area and more by visiting the pattern on garnstudio.com. © 1982-2024 DROPS Design A/S. We reserve all rights. This document, including all its sub-sections, has copyrights. Read more about what you can do with our patterns at the bottom of each pattern on our site. |
With over 40 years in knitting and crochet design, DROPS Design offers one of the most extensive collections of free patterns on the internet - translated to 17 languages. As of today we count 304 catalogs and 11422 patterns - 11417 of which are translated into English (US/in).
We work hard to bring you the best knitting and crochet have to offer, inspiration and advice as well as great quality yarns at incredible prices! Would you like to use our patterns for other than personal use? You can read what you are allowed to do in the Copyright text at the bottom of all our patterns. Happy crafting!
Comments / Questions (22)
DANIELA ESPOSITO wrote:
Ma per fare il tallone devo spezzare il filo o devo continuare senza spezzare il filo?
22.09.2023 - 10:34DROPS Design answered:
Buonasera Daniela, non deve tagliare il filo. Buon lavoro!
22.09.2023 - 23:44Nete wrote:
Jeg prøvede at hækle efter opskriften på str 37, som er den STR jeg bruger, og trods den passer fint foden ser der ud til, så er skaftet for smalt,til at jeg overhovedet kan få sokken op over min fod. Kan man tilpssse det på nogen måde
05.03.2021 - 23:55DROPS Design answered:
Hej Nete, kan det være at du hækler for fast? Du skal have 28 st i bredden på 10 cm :)
08.03.2021 - 14:37Gourmelen wrote:
Pour la fin du modele je suis au diminution en maille serré j ai mis mes 2 marqueurs mais j ai une diminution qui tombe juste à ma 1er maille en l air du début comment faire cette diminution comme indiqué sur le modele ou en maille coulée ou me suis je trompée merci encore
03.02.2020 - 09:35DROPS Design answered:
Bonjour Mme Gourmelen, si votre diminution arrive au niveau de la 1ère m, pour simplifier, vous pouvez commencer le tour par 1 ml (qui cette fois ne remplacera pas la 1ère m du tour), faites votre 1ère diminution, et à la fin du tour, terminez par 1 mc dans cette diminution, et continuez ainsi, vous serez sûre de bien diminuer le bon nombre de mailles. Bon crochet!
03.02.2020 - 10:36Gourmelen wrote:
Bonjour quand je reprends la couleur ecru àla fin des diminutions des 36 brides je place un marqueur au niveau des 14 brides ou 15 brides des cotés je compte les 30 brides espacés à quel moment je suis presque a la fin merci encore pour votre aide
29.01.2020 - 09:23DROPS Design answered:
Bonjour Mme Gourmelen, vous placez 2 marqueurs espacés de 30 brides = chacun de ces marqueurs doivent être de chaque côté du pied (enfilez la chaussette si vous avez un doute) pour que les diminutions se fassent le long des orteils. Et vous diminuez ensuite ainsi à chaque marqueur: crochetez jusqu'à ce qu'il reste 2 m avant le marqueur, 2 m écoulées ensemble, (marqueur), 2 m écoulées ensemble. Bon crochet!
29.01.2020 - 09:40Gourmelen wrote:
Une derniere question mes 3 mailles en l air du début de mes 14 brides aprés les 15 brides du dernier cote du talon je fais toujours mes 3 mailles en l air ou je fais une bride sur les 3 mailles en l air quand je travaille en rond merci apres je vais vraiment les faire car je viens de recevoir ma laine fabel de chez drops
20.01.2020 - 12:47DROPS Design answered:
Bonjour Mme Gourmelen, au début de chaque tour, vous remplacez la 1ère bride par 3 ml et la 1ère ms par 1 ml - cf ASTUCE CROCHET. Bon crochet!
20.01.2020 - 13:12Gourmelen Marie wrote:
Bonjour apres le talon j ai bien j ai bien fait 1 b dans 14 ms du talon les 15 coté du talon 1b dans les 36 ms dessus du pied et 15 b autre coté du talon mais apres je ne sais pas si je travaille sur toutes les mailles 14 15 36 1 5 ou que sur les 36 mailles du dessus du pied pendant 10 rangs je realise la 2eme tailles du modele merci
19.01.2020 - 09:30DROPS Design answered:
Bonjour Mme Gourmelen, après le talon, vous devez avoir 80 brides au total sur votre rang (= 14+15+36+15). Vous crochetez en rond sur ces 80 brides en diminuant en même temps 1 bride de chaque côté des 36 brides du dessus du pied (2 diminutions par tour) jusqu'à ce qu'il reste 60 brides. Bon crochet!
20.01.2020 - 09:16Gourmelen Marie wrote:
Bonjour j aimerais savoir si je fais ma diminution pour le talon sur les 20 ms ou sur la 1er des 8 et que veux dire 20-21-23 tourner merci
16.01.2020 - 09:32DROPS Design answered:
Bonjour Mme Gourmelen, dans la 2ème taille, vous crochetez le 1er rang des diminutions du talon ainsi: 20 ms, (il reste 8 ms du rang précédent), écoulez 2 ms ensemble = 21 ms. Tournez, crochetez 13 ms (il reste 8 ms du rang précédent), puis 2 ms écoulées ensemble = 14 ms. Continuez ainsi - cf vidéo. 20-21-23 = 20 ms en taille 1, 21 ms dans la 2ème taille et 23 ms dans la 3ème taille. Bon crochet!
16.01.2020 - 10:02Sophie Andersen wrote:
Hvordan kan jeg blive ved med at fortsætte hælindtagningen efter række 3 er gjort den første gang? \r\n\"Gentag 3.række totalt 10-12-12 gange, dvs til alle m på hver side af de 14-14-16 midterste fm på hælen er taget ind\" - og hvor sidder disse masker helt præcist? På forhånd tak!
16.12.2019 - 18:47Robin R Cote wrote:
Bonjour avez-vous des vidéo complet comment faire des bas au crochet
24.04.2019 - 12:06DROPS Design answered:
Bonjour Mme Cote, vous trouverez cette vidéo pour réaliser le talon, le reste se fait simplement en suivant les explications, vous trouverez d'autres vidéos relatives à ce modèle montrant les techniques basiques: augmentations, diminutions etc... Bon crochet!
24.04.2019 - 13:13Pia Rifbjerg wrote:
Jeg forstår simpelthen ikke opskriften når jeg når til hælindtagningen? Jeg hækler 5,5 cm 28 fm frem og tilbage. Sætter et mærke. Så skal jeg tage ind. Tager 1 m ind efter beskrivelsen, men det kan jeg da ikke gøre 12 gange. Og hvornår, hvordan skal hæl og resten af foden samles? Jeg fatter det overhovedet ikke!
06.12.2016 - 16:34DROPS Design answered:
Hej Pia. Jo, det kan du. I starten af opskriften staar der hvordan du haekler haelindtagning (se under HÆLINDTAGNING:) Og naar du er faerdig har du 16 fm tilbage paa haelen. Saa haekler du de 16 fm, 16 st langs siden (kanten) af haelen og 1 st i hver af de 38 st ovenpå foden, 16 st langs den anden side (kanten) af hælen. Herfra fortsaetter du rundt.
07.12.2016 - 13:54