DROPS Safran uni colour 100% Cotton |
2.05 $ /50g |
Order |
Clicking the ORDER button will redirect you to Wool Warehouse Direct Ltd website
The yarn cost is calculated from the pattern’s smallest size and the yarn’s cheapest product type. Looking for an even better price? You might find it on the DROPS Deals!
-------------------------------------------------------
Alternative Yarn – See how to change yarns here
Yarn Groups A to F – Use the same pattern and change the yarn here
Yarn usage using an alternative yarn – Use our yarn converter here
-------------------------------------------------------
DROPS Safran uni colour 100% Cotton 2.05 $ /50g Order |
Clicking the ORDER button will redirect you to Wool Warehouse Direct Ltd website
The yarn cost is calculated from the pattern’s smallest size and the yarn’s cheapest product type. Looking for an even better price? You might find it on the DROPS Deals!
All measurements in charts are in cm.
= light brown mix |
|
= natural | |
= no stitch yet, just skip this square |
|
= inc 1 st by working 2 sts into 1 |
|
= start with M.1(1), then M.1(2) |
Each of our patterns has specific tutorial videos to help you.
These step-by-step tutorials might also help you:
Why is the knitting/crochet tension so important?
Knitting tension is what determines the final measurements of your work, and is usually measured per 10 x 10 cm. It is provided like so: number of stitches in width x number of rows in height - eg: 19 stitches x 26 rows = 10 x 10 cm.
The knitting tension is very individual; some people knit/crochet loosely while others work tightly. You adjust the knitting tension with the needle size, which is why the suggested needle size only serve as a guide! You need to adjust this (up or down) to ensure that YOUR knitting tension matches the knitting tension provided in the pattern. If you work with a different knitting tension than provided you will have a different yarn consumption, and your work will have different measurements than what the pattern suggests.
The knitting tension also determines which yarns can replace each other. As long as you achieve the same knitting tension you can replace one yarn with another.
See DROPS lesson: How to measure your tension/gauge
See DROPS video: How to make a gauge tension swatch
How do I know how many balls of yarn I need?
The required amount of yarn is provided in grams, eg: 450 g. To calculate how many balls you’ll need you first need to know how many grams are in 1 ball (25g, 50g or 100g). This information is available if you click on the individual yarn quality on our pages. Divide the amount required with the amount of each ball. For example, if each ball is 50g (the most common amount), the calculation will be as follows: 450 / 50 = 9 balls.
Can I use a different yarn than what the pattern suggests?
The important thing when changing from one yarn to another is that the knitting/crochet tension remains the same. This is so that the measurements of the finished piece will be the same as on the sketch provided. It is easier to achieve the same knitting tension using yarns from the same yarn group. It is also possible to work with multiple strands of a thinner yarn to achieve the knitting tension of a thicker one. Please try our yarn converter. We recommend you to always work a test swatch.
Please NOTE: when changing yarn the garment might have a different look and feel to the garment in the photo, due to individual properties and qualities of each yarn.
See DROPS lesson: Can I use a different yarn than the one mentioned in the pattern?
What are the yarn groups?
All our yarns are categorised into yarn groups (from A to F) according to thickness and knitting tension – group A contains the thinnest yarns and group F the thickest. This makes it easier for you to find alternative yarns to our patterns, should you wish to switch yarn. All yarns within the same group have a similar knitting tension and can easily replace each other. However, different yarn qualities have different structures and properties which will give the finished work a unique look and feel.
How do I use the yarn converter?
At the top of all our patterns you’ll find a link to our yarn converter, which is a helpful tool should you wish to use a different yarn than suggested. By filling in the yarn quality you wish to replace, the amount (in your size) and number of strands, the converter will present good alternative yarns with the same knitting tension. Additionally it will tell you how much you’ll require in the new qualities and whether you’ll need to work with multiple strands. Most skeins are 50g (some are 25g or 100g).
If the pattern is worked with multiple colours, every colour will have to be converted separately. Similarly, if the pattern is worked with several strands of different yarns (for example 1 strand Alpaca and 1 strand Kid-Silk) you will have to find alternatives for each, individually.
Why do you show discontinued yarns in the patterns?
Since different yarns have different qualities and textures we have chosen to keep the original yarn in our patterns. However, you can easily find options among our available qualities by using our yarn converter, or simply pick a yarn from the same yarn group.
It is possible that some retailers still have discontinued yarns in stock, or that someone has a few skeins at home that they would like to find patterns for.
The yarn converter will provide both alternative yarn as well as required amount in the new quality.
What size should I knit?
If you think it's hard to decide what size to make, it can be a good idea to measure a garment you own already and like the size of. Then you can pick the size by comparing those measures with the ones available in the pattern's size chart.
You'll find the size chart at the bottom of the pattern.
See DROPS lesson: How to read size chart
Why do I get the wrong knitting tension with the suggested needle size?
The needle size provided in the pattern serves only as a guide, the important thing is to follow the knitting tension. And since knitting tension is very individual, you will have to adjust the needle size to ensure that YOUR tension is the same as in the pattern – maybe you’ll have to adjust 1, or even 2 needle sizes, up or down to achieve the correct tension. For this, we recommend that you work test swatches.
Should you work with a different knitting tension than the one provided, the measurements of the finished garment might deviate from the measurement sketch.
See DROPS lesson: How to measure your tension/gauge
See DROPS video: How to make a gauge tension swatch
Why is the pattern worked top-down?
Working a garment top-down provides more flexibility and room for personal adjustment. For example it is easier to try the garment on while working, as well as making adjustments to length of yoke and shoulder caps.
The instructions are carefully explaining every step, in the correct order. Diagrams are adjusted to the knitting direction and are worked as usual.
How do I work according to a knitting diagram?
The diagram depicts all rows/rounds, and every stitch seen from the right side. It is read from bottom to top, from right to left. 1 square = 1 stitch.
When working back and forth, every other row is worked from the right side and every other row is worked from the wrong side. When working from the wrong side, the diagram will have to be worked reversed: from left to right, knit stitches are purled, purl stitches are knit etc.
When working in the round every round is worked from the right side and the diagram are worked from right to left on all rounds.
See DROPS lesson: How to read knitting diagrams
How do I work according to a crochet diagram?
The diagram depicts all rows/rounds, and every stitch seen from the right side. It is worked from bottom to top, from right to left.
When working back and forth every other row is worked from the right side: from right to left and every other row is worked from the wrong side: from left to right.
When working in the round, every row in the diagram are worked from the right side, from right to left.
When working a circular diagram you start in the middle and work your way outwards, counter clockwise, row by row.
The rows usually start with a given number of chain stitches (equivalent to the height of the following stitch), this will either be depicted in the diagram or explained in the pattern.
See DROPS lesson: How to read crochet diagrams
How do I work several diagrams simultaneously on the same row/round?
Instructions for working several diagrams after each other on the same row/round, will often be written like so: “work A.1, A.2, A.3 a total of 0-0-2-3-4 times". This means you work A.1 once, then A.2 is worked once, and A.3 is repeated (in width) the number of times provided for your size – in this case like so: S = 0 times, M = 0 times, L=2 times, XL= 3 times and XXL = 4 times.
The diagrams are worked as usual: begin with the first row in A.1, then work the first row in A.2 etc.
See DROPS lesson: How to read knitting diagrams
See DROPS lesson: How to read crochet diagrams
Why are the sleeves shorter in larger sizes?
The total width of the garment (from wrist-to-wrist) will be larger in the larger sizes, despite the actual sleeves being shorter. The larger sizes have longer sleeve caps and wider shoulders, so there will be a good fit in all sizes.
Where on the garment is the length measured?
The measurement sketch/schematic drawing provides information regarding the full length of the garment. If it’s a jumper or a jacket the length is measured from the highest point on the shoulder (usually closest to the neckline), and straight down to the bottom of the garment. It is NOT measured from the tip of shoulder. Similarly, the length of yoke is measured from the highest point on the shoulder and down to where yoke is split into body and sleeves.
See DROPS lesson: How to read a schematic drawing
What is a repeat?
Diagrams are often repeated on the round or in height. 1 repeat is the diagram the way it appears in the pattern. If it says to work 5 repeats of A.1 in the round, then you work A.1 a total of 5 times after/next to each other in the round. If it says to work 2 repeats of A.1 vertically/in height you work the entire diagram once, then begin again at the start and work the entire diagram one more time.
Why does the piece start with more chain stitches than it’s worked with?
Chain stitches are slightly narrower than other stitches and to avoid working the cast-on edge too tight, we simply chain more stitches to begin with. The stitch count will be adjusted on the following row to fit the pattern and measurement sketch.
Why increase before the rib edge when the piece is worked top-down?
The rib edge is more elastic and will contract slightly compared to, for example, stocking stitch. By increasing before the rib edge, you avoid a visible difference in width between the rib edge and the rest of the body.
Why increase in the cast-off edge?
It’s very easy to cast off too tightly, and by making yarn overs while casting off (and simultaneously casting these off) you avoid a too tight cast off edge.
See DROPS video: How to bind off with yarn overs (yo)
How do I increase/decrease on every 3rd and 4th row/round alternately?
To achieve an even increase (or decrease) you can increase on, for example: every 3rd and 4th row alternately, like so: work 2 rows and increase on the 3rd row, work 3 rows and increase on the 4th. Repeat this until the increase is complete.
See DROPS lesson: Increase or decrease 1 st on every 3rd and 4th row alternately
How can I work a jacket in the round instead of back and forth?
Should you prefer to work in the round instead of back and forth, you may of course adjust the pattern. You’ll need to add steeks mid-front (usually 5 stitches), and follow the instructions. When you would normally turn and work from the wrong side, simply work across the steek and continue in the round. At the end you’ll cut the piece open, pick up stitches to work bands, and cover the cut edges.
See DROPS video: How to knit steeks and cut open
Can I work a jumper back and forth instead of in the round?
Should you prefer to work back and forth instead of in the round, you may of course adjust the pattern so you work the pieces separately and then assemble them at the end. Divide the stitches for the body in 2, add 1 edge stitch in each side (for sewing) and work the front and back pieces separately.
See DROPS lesson: Can I adapt a pattern for circular needles into straight needles?
Why is the pattern slightly different than what I see in the photo?
Pattern repeats can vary slightly in the different sizes, in order to get the correct proportions. If you’re not working the exact same size as the garment in the photo, yours might deviate slightly. This has been carefully developed and adjusted so that the complete impression of the garment is the same in all sizes.
Make sure to follow instructions and diagrams for your size!
How do I make a women’s size garment into a men’s size one?
If you have found a pattern you like which is available in women’s size it’s not very difficult to convert it to men’s size. The biggest difference will be the length of sleeves and body. Start working on the women size that you think would fit across the chest. The additional length will be worked right before you cast off for the armhole/sleeve cap. If the pattern is worked top-down you can add the length right after the armhole or before the first decrease on sleeve.
Regarding additional yarn amount, this will depend on how much length you add, but it is better with a skein too many than too few.
How do I prevent a hairy garment from shedding?
All yarns will have excess fibres (from production) that might come off as lint or shedding. Brushed yarns (ie hairier yarns) have more of these loose, excess fibres, causing more shedding.
Shedding also depends on what is worn under or over the garment, and whether this pulls at the yarn fibres. It’s therefore not possible to guarantee that there will be no shedding
Below are some tips on how to get the best result when working with hairier yarns:
1. When the garment is finished (before you wash it) shake it vigorously so the looser hairs come off. NOTE: do NOT use a lint roller, brush or any method that pulls at the yarn.
2. Place the garment in a plastic bag and put it in your freezer - the temperature will cause the fibres to become less attached to each other, and excess fibres will come off easier.
3. Leave in the freezer for a few hours before taking it out and shaking it again.
4. Wash the garment according to the instructions on the yarn label.
Why does my garment pill?
Pilling is a natural process that happens to even the most exclusive of fibers. It's a natural sign of wear and tear that is hard to avoid, and that is most visible in high friction areas of your garment like a sweater's arms and cuffs.
You can make your garment look as new by removing the pilling, using a fabric comb or a pill/lint remover.
DROPS 85-4 |
||||||||||||||||
|
||||||||||||||||
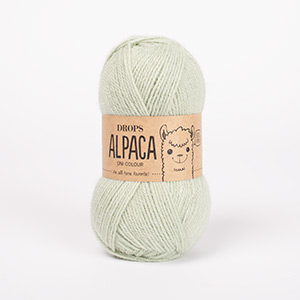
Set of knitted pullover for men, with high neck and stripes in DROPS Alpaca and DROPS Safran, plus mittens in DROPS Karisma
DROPS 85-4 |
||||||||||||||||
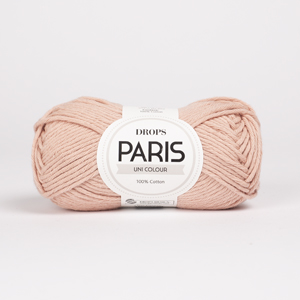
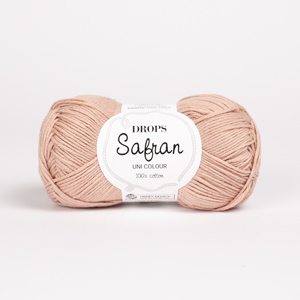
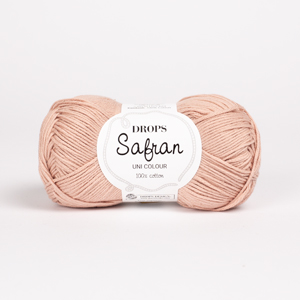
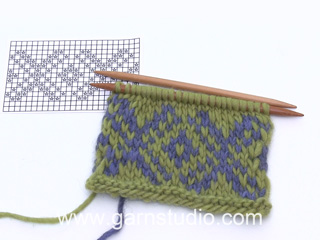
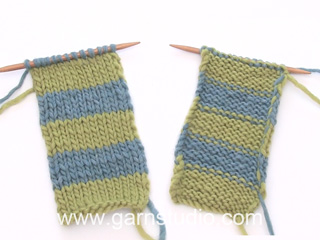
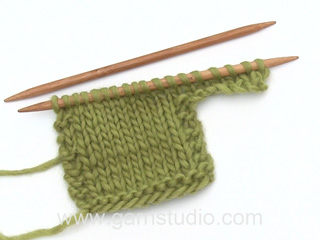
Gauge: 16 sts x 20 rows with 1 strand of each yarn in stockinette st = 10 x 10 cm. Rib: *K 4, P 4*, repeat from *-*. Stripe Pattern – Body: 1 strand beige S + 1 strand light beige A until the piece measures (2) 3-3-3-4 cm, 1 strand beige S + 1 strand off white A until the piece measures (18) 21-21-21-23 cm, 1 strand off white A + 1 strand medium gray S until the piece measures (25) 29-29-29-31 cm, 1 strand light beige A + 1 strand beige S until the piece measures (29) 34-34-34-36 cm, 1 strand light brown mix A + 1 strand medium gray S until the piece measures (31) 37-37-37-39 cm, 1 strand light brown mix A + 1 strand brown S until the piece measures (40) 48-48-48-50 cm, 1 strand light brown mix A + 1 strand medium gray S until the piece measures (42) 51-51-51-53 cm, 1 strand light brown mix A + 1 strand beige S until the piece measures (45) 55-55-55-57 cm, 1 strand beige S + 1 strand medium gray S until the piece measures (47) 58-58-58-60 cm, then 1 strand beige S + 1 strand light beige A to finished measurements. Stripe Pattern – sleeves: 1 strand light beige A + 1 strand beige S until the piece measures 13 cm, 1 strand beige S + 1 strand off white A until the piece measures 17 cm, 1 strand off white A + 1 strand medium gray S until the piece measures 43 cm, 1 strand medium gray S + 1 strand light brown mix A until the piece measures 46 cm, 1 strand light brown mix A + 1 strand beige S until the piece measures 49 cm, 1 strand beige S + 1 strand medium gray S until the piece measures 52 cm, then 1 strand beige S + 1 strand light beige A to finished measurements. Front: Cast on 74-82-90-98-106 sts with 1 strand each beige Safran + light beige Alpaca (2 strands). Knit Stripe Pattern - Body – see instructions above – in rib as follows: Row 1 (right side): Sizes 12/14 years + XL: K 1 (edge st knit in garter st), K 2, * P 4, K 4 *, repeat from * - * to last 7 sts, P 4, K 2 and K 1 (edge st knit in garter st). Sizes S/M + L + XXL: K 1 (edge st knit in garter st), P 2, * K 4, P 4 *, repeat from * - * to last 7 sts, K 4, P 2 and K 1 (edge st knit in garter st). Row 2 (wrong side): Sizes 12/14 years + XL: K 1 (edge st knit in garter st), P 2, * K 4, P 4 *, repeat from * - * to last 7 sts, K 4, P 2 and K 1 (edge st knit in garter st). Sizes S/M + L + XXL: K 1 (edge st knit in garter st), K 2, * P 4, K 4 *, repeat from * - * to last 7 sts, P 4, K 2 and K 1 (edge st knit in garter st). When the rib measures 5-7-7-7-7 cm establish pattern as follows (right side): K 1 (edge st knit in garter st), 10-6-6-10-14 sts stockinette st, 4 sts reverse stockinette st, 44-60-68-68-68 sts stockinette st, 4 sts reverse stockinette st, 10-6-6-10-14 sts stockinette st and K 1 (edge st knit in garter st). On the 2nd row after the rib in sizes L + XL + XXL: dec 4 sts evenly distributed over the 68 center sts = 74-82-86-94-102 sts. When the piece measures 10 cm inc 1 st at each side (inc inside the edge st for a smoother seam) every 6-9-9-13-14 cm a total of 4-4-4-3-3 times = 82-90-94-100-108 sts – knit the increased sts in stockinette st. When the piece measures 36-44-45-46-47 cm bind off for armhole at each side every other row: 3 sts 1 time, 2 sts 2-1-1-2-3 times and 1 st 3-2-2-3-4 times = 62-76-80-80-82 sts (there are now 5-4-4-4-5 sts in stockinette st at each side of the 4 sts in reverse stockinette st at side edge). When the piece measures 51-60-62-64-66 cm bind off the center 14-16-16-16-18 sts for the neck. Then bind off at each neck edge every other row: 2 sts 2 times and 1 st 2 times = 18-24-26-26-26 sts remain on each shoulder. Bind off when the piece measures 56-66-68-70-72 cm. Back: Cast on and knit the same as the front. Bind off for armhole as on front. When the piece measures 54 64-66-68-70 cm bind off the center 24-26-26-26-28 sts for the neck. On the next row dec 1 st at each neck edge = 18-24-26-26-26 sts remain on each shoulder. Bind off when the piece measures 56-66-68-70-72 cm. Sleeve: Cast on 42-42-42-50-50 sts with 1 strand each beige Safran + light beige Alpaca (2 strands). Knit Stripe Pattern - sleeve – see instructions above – and knit rib keeping 1 edge st at each side in garter st. When the rib measures 8-10-10-10-10 cm change to stockinette st. When the piece measures 12-12-14-12-14 cm inc 1 st at each side every 4-3-2.5-3.5-3 cm a total of 9-12-14-11-12 times = 60-66-70-72-74 sts. When sleeve measures 47-48-50-50-50 cm bind off for sleeve cap at each side every other row: 3 sts 1 time, 2 sts 2-2-2-3-3 times and 1 st 3-2-2-2-4 times, then bind off 2 sts at each side until the piece measures 55-55-57-59-61 cm, then bind off 3 sts at each side 1 time. Bind off the remaining sts, the piece measures approx. 56-56-58-60-62 cm. Assembly: Sew shoulder seams. Neckband: Pick up 64 or 72 sts (divisible by 8) around the neck on double-pointed needles with 1 strand each beige Safran + light beige Alpaca ; join and place a marker at the join. P 1 row, K 1 row, P 1 row, K 1 row, then knit rib – see instructions above. When the collar measures 8-10-10-10-10 cm change to 1 strand each beige Safran + brown Alpaca . Continue the rib until the collar measures 12-14-14-14-14 cm and bind off in rib. Sew in sleeves. Sew sleeve and side seams using edge sts as a seam allowance. ____________________________________________________________________ MITTENS: Sizes: (S/M) L/XL Materials: DROPS KARISMA SUPERWASH from Garnstudio (100)-100 gr nr 55, light brown heather (50)- 50 gr nr 01, natural DROPS 3.5 mm [US 4] double-pointed needles, or size needed to obtain correct gauge. Gauge: 22 sts x 30 rows in stockinette st = 10 x 10 cm Rib: *K 2, P 2*, repeat from *-*. Pattern: The pattern is seen from the right side and is knit entirely in stockinette st. Arrows indicate where the markers are placed for the sides. The different sizes are marked with lines, and are explained in the pattern below. Decreasing tips (for top of mitten and thumb): Dec at each side of 5 sts on mitten and 3 sts on thumb. Start 4 sts before marker on mitten and 3 sts before marker on thumb and dec as follows: K 2 tog, 5 or 3 sts in pattern (the marker sits in the middle of these sts), sl 1 as if to knit, K 1, psso. Left mitten: Cast on (48) 56 sts on double-pointed needles with light brown heather; join and knit rib – see instructions above. When the piece measures (12) 13 cm K 1 row, decreasing (8) 12 sts evenly distributed on the row = (40) 44 sts – measure the work from here. Knit Pattern 1 (M.1). For Size S/M you will not knit all the sts shown in the chart. Start at lower edge in right corner of chart and knit to the left as follows: 2 sts, knit and put a marker in the next st (= side), 2 sts, (S/M skip 1 square), (11) 13 sts (from size line to size line = palm), (S/M skip 1 square), 2 sts, knit and put a marker in the next st (= side), 2 sts, (S/M skip 1 square), and (19) 21 sts (from size line to size line = upper hand). NOTE: the black squares are NOT sts – both sizes skip those squares on the chart. Continue with pattern, increasing for thumb as shown in chart. After all thumb-sts are incd (= 11 sts) put these on a st holder. Cast on 11 new sts over sts on st holder and join = (48) 52 sts. Continue to knit Pattern 1 (there are now (23) 25 sts between sts with markers at each side). When the piece measures (17) 18 cm dec 1 st at each side of 5 sts at each side = 4 sts decd per row – see Decreasing tips above: dec every row (10) 11 times = 8 sts remain. Pull yarn through the remaining sts and fasten neatly. Thumb: Put the 11 sts from st holder onto needles, and inc 13 sts = 24 sts. Divide sts onto 3 double-pointed needles and join. Knit Pattern 2 – place the pattern so that it follows the pattern over the sts from mitten and put a marker at each side (at arrows on chart). When thumb measures (4) 5 cm dec 1 st at each side of 3 sts at each marker as on mitten – see Decreasing tips above: dec every rows 5 times = 4 sts remain. Pull yarn through remaining sts and fasten neatly. Right mitten: Knit the same as the left, reversing shaping. |
||||||||||||||||
Diagram explanations |
||||||||||||||||
|
||||||||||||||||
Have you made this or any other of our designs? Tag your pictures in social media with #dropsdesign so we can see them! Do you need help with this pattern?You'll find tutorial videos, a Comments/Questions area and more by visiting the pattern on garnstudio.com. © 1982-2024 DROPS Design A/S. We reserve all rights. This document, including all its sub-sections, has copyrights. Read more about what you can do with our patterns at the bottom of each pattern on our site. |
With over 40 years in knitting and crochet design, DROPS Design offers one of the most extensive collections of free patterns on the internet - translated to 17 languages. As of today we count 304 catalogs and 11422 patterns - 11417 of which are translated into English (US/in).
We work hard to bring you the best knitting and crochet have to offer, inspiration and advice as well as great quality yarns at incredible prices! Would you like to use our patterns for other than personal use? You can read what you are allowed to do in the Copyright text at the bottom of all our patterns. Happy crafting!
Comments / Questions (12)
Helen Hjalmarsson wrote:
Blir såååä ledsen när jag ser snygga tröjan på bilden, jag beställde exakt de förinställda garnerna och färgerna för att tröjan 85-4; Lurendrejeri! Det finns ingenting som är vitt på tröjan på bilden Vill du göra tröjan på bilden så beställ färger efter egna val
29.08.2023 - 11:38Christiane G wrote:
Bonjour. Je ne comprends pas comment on peut rabattre les mailles des emmanchures à 45 cm de hauteur totale (tailleL) alors que les augmentations tous les 13 cm nous amène à 49 m de hauteur totale. Y a t il une erreur dans les explications ou bien me suis je trompée qudlque part? Merci
17.02.2022 - 22:03DROPS Design answered:
Bonjour Christiane, en taille L, on augmente tous les 9 cm , soit: la 1ère à 10 cm, la 2ème à 19 cm, la 3ème à 28 cm et la 4ème à 37 cm - soit 8 cm avant les emmanchures (c'est en XL que l'on augmente tous les 13 cm, mais on n'augmente que 3 fois). Bon tricot!
18.02.2022 - 08:09Helen Hjalmarsson wrote:
Tröjan på bilden; färgerna stämmer inte med färgerna i mönstret. Uppe vid hals skall det enligt mönstret vara ett färgbyte till ljus ljus beige i både Alpaca och Safran. Det är det inte på bilden. Jag vill göra tröjan som på bilden. Vilka färger är det stickat i överst på tröjan på bilden? Brun Alpaca + Beige Safran? Eller Natur Alpaca .+ beige Safran?
27.01.2022 - 01:56DROPS Design answered:
Hej Helen, det kan være at farverne har forandret sig lidt i årene løb. Her kan du se de 2 farvekort: DROPS Alpaca og DROPS Safran tag gerne kontakt med butikken hvor du køber garnet, de hjælper gerne til :)
27.01.2022 - 16:03Nathalie Moisand wrote:
Pour le modèle DROPS 85-4 : les différentes parties de ce pull se tricotent-t-elles bien avec des aiguilles droites ? Si je comprends bien, seul le col se tricote avec des aiguilles double pointes ? Merci.
08.12.2021 - 18:18DROPS Design answered:
Bonjour Mme Moisand, on utilise ici en fait des aiguilles circulaires pour avoir suffisamment de place pour y loger toutes les mailles, mais on va tricoter en rangs, donc vous pouvez utiliser des aiguilles droites, vos mailles seront juste plus serrées, pensez à bien conserver la bonne tension. Retrouvez plus d'infos sur les aiguilles circulaires ici. Seul le col se tricote effectivement en rond. Bon tricot!
09.12.2021 - 07:23Janette wrote:
Thanks for your reply:) Since the pattern requires two strands does that mean that you could substitute with 10 ply wool and knit with one strand? :) I am making this pattern for someone else and they have bought 10 ply wool!
06.08.2019 - 07:45DROPS Design answered:
Dear Janette, you might find more informations about alternatives and calculating amount of yarn here. Happy knitting!
07.08.2019 - 11:50Janette wrote:
Hello What ply is the wool for this pattern? Many thanks:)
05.08.2019 - 06:30DROPS Design answered:
Hi Janette. DROPS Alpaca is 5 ply, DROPS Safran is 5 ply as well. Happy knitting!
05.08.2019 - 07:58Maja Brandt wrote:
På sid 2 i Drops 85-4 8 raden mitt på står det ...+ 1 tråd flinta S ..- Flinta finns inte i garnlistan, ska det vara grå?
18.01.2018 - 22:12DROPS Design answered:
Hei Maja. Her har det nok bare været en skrivefeil. Ja, så flint fargen skal være grå (mellomgrå, som det står under materialer). God Fornøyelse!
19.01.2018 - 09:33Pauline De Reus wrote:
Ik heb de indruk dat het patroon niet overeen komt met de foto? Er staat een telpatroon bij bv?
29.01.2014 - 07:00DROPS Design answered:
Hoi Pauline. Het patroon is correct. Voor de trui staat de beschrijving voor de strepen in het patroon zelf en de teltekening hoort bij de wanten.
29.01.2014 - 10:26Anne wrote:
Edelliseen vastaukseen viitaten. Se nimenomaan puuttuu suomenkielisiltä sivuilta. Joten yritin kysyä onko sitä sinne mahdollista saada.
11.11.2013 - 17:52DROPS Design answered:
Nyt myös puseron ohje löytyy suomenkielisiltä sivuilta.
15.11.2013 - 14:18Anne wrote:
Onko neulepaitaan suomen kielistä ohjeistusta?
09.11.2013 - 20:07DROPS Design answered:
Suomenkielinen ohje löytyy suomenkielisiltä sivuilta. Pääset myös suoraan suomenkieliseen ohjeeseen klikkaamalla suomen lippua kuvan alla olevassa valikossa.
11.11.2013 - 16:29