DROPS Kid-Silk uni colour 75% Mohair, 25% Silk |
6.75 $ /25g |
Order |
Clicking the ORDER button will redirect you to Wool Warehouse Direct Ltd website
The yarn cost is calculated from the pattern’s smallest size and the yarn’s cheapest product type. Looking for an even better price? You might find it on the DROPS Deals!
-------------------------------------------------------
Alternative Yarn – See how to change yarns here
Yarn Groups A to F – Use the same pattern and change the yarn here
Yarn usage using an alternative yarn – Use our yarn converter here
-------------------------------------------------------
DROPS Kid-Silk uni colour 75% Mohair, 25% Silk 6.75 $ /25g Order |
Clicking the ORDER button will redirect you to Wool Warehouse Direct Ltd website
The yarn cost is calculated from the pattern’s smallest size and the yarn’s cheapest product type. Looking for an even better price? You might find it on the DROPS Deals!
This pattern has been corrected. Click here to see the correction/s.
All measurements in charts are in cm.
= knit | |
= purl | |
= slip 3 stitches on cable needle behind piece, knit 3, knit 3 from cable needle |
|
= slip 1 stitch on cable needle behind piece, knit 3, purl 1 from cable needle |
|
= slip 3 stitches on cable needle in front of piece, purl 1, knit 3 from cable needle |
Each of our patterns has specific tutorial videos to help you.
These step-by-step tutorials might also help you:
Why is the knitting/crochet tension so important?
Knitting tension is what determines the final measurements of your work, and is usually measured per 10 x 10 cm. It is provided like so: number of stitches in width x number of rows in height - eg: 19 stitches x 26 rows = 10 x 10 cm.
The knitting tension is very individual; some people knit/crochet loosely while others work tightly. You adjust the knitting tension with the needle size, which is why the suggested needle size only serve as a guide! You need to adjust this (up or down) to ensure that YOUR knitting tension matches the knitting tension provided in the pattern. If you work with a different knitting tension than provided you will have a different yarn consumption, and your work will have different measurements than what the pattern suggests.
The knitting tension also determines which yarns can replace each other. As long as you achieve the same knitting tension you can replace one yarn with another.
See DROPS lesson: How to measure your tension/gauge
See DROPS video: How to make a gauge tension swatch
How do I know how many balls of yarn I need?
The required amount of yarn is provided in grams, eg: 450 g. To calculate how many balls you’ll need you first need to know how many grams are in 1 ball (25g, 50g or 100g). This information is available if you click on the individual yarn quality on our pages. Divide the amount required with the amount of each ball. For example, if each ball is 50g (the most common amount), the calculation will be as follows: 450 / 50 = 9 balls.
Can I use a different yarn than what the pattern suggests?
The important thing when changing from one yarn to another is that the knitting/crochet tension remains the same. This is so that the measurements of the finished piece will be the same as on the sketch provided. It is easier to achieve the same knitting tension using yarns from the same yarn group. It is also possible to work with multiple strands of a thinner yarn to achieve the knitting tension of a thicker one. Please try our yarn converter. We recommend you to always work a test swatch.
Please NOTE: when changing yarn the garment might have a different look and feel to the garment in the photo, due to individual properties and qualities of each yarn.
See DROPS lesson: Can I use a different yarn than the one mentioned in the pattern?
What are the yarn groups?
All our yarns are categorised into yarn groups (from A to F) according to thickness and knitting tension – group A contains the thinnest yarns and group F the thickest. This makes it easier for you to find alternative yarns to our patterns, should you wish to switch yarn. All yarns within the same group have a similar knitting tension and can easily replace each other. However, different yarn qualities have different structures and properties which will give the finished work a unique look and feel.
How do I use the yarn converter?
At the top of all our patterns you’ll find a link to our yarn converter, which is a helpful tool should you wish to use a different yarn than suggested. By filling in the yarn quality you wish to replace, the amount (in your size) and number of strands, the converter will present good alternative yarns with the same knitting tension. Additionally it will tell you how much you’ll require in the new qualities and whether you’ll need to work with multiple strands. Most skeins are 50g (some are 25g or 100g).
If the pattern is worked with multiple colours, every colour will have to be converted separately. Similarly, if the pattern is worked with several strands of different yarns (for example 1 strand Alpaca and 1 strand Kid-Silk) you will have to find alternatives for each, individually.
Why do you show discontinued yarns in the patterns?
Since different yarns have different qualities and textures we have chosen to keep the original yarn in our patterns. However, you can easily find options among our available qualities by using our yarn converter, or simply pick a yarn from the same yarn group.
It is possible that some retailers still have discontinued yarns in stock, or that someone has a few skeins at home that they would like to find patterns for.
The yarn converter will provide both alternative yarn as well as required amount in the new quality.
What size should I knit?
If you think it's hard to decide what size to make, it can be a good idea to measure a garment you own already and like the size of. Then you can pick the size by comparing those measures with the ones available in the pattern's size chart.
You'll find the size chart at the bottom of the pattern.
See DROPS lesson: How to read size chart
Why do I get the wrong knitting tension with the suggested needle size?
The needle size provided in the pattern serves only as a guide, the important thing is to follow the knitting tension. And since knitting tension is very individual, you will have to adjust the needle size to ensure that YOUR tension is the same as in the pattern – maybe you’ll have to adjust 1, or even 2 needle sizes, up or down to achieve the correct tension. For this, we recommend that you work test swatches.
Should you work with a different knitting tension than the one provided, the measurements of the finished garment might deviate from the measurement sketch.
See DROPS lesson: How to measure your tension/gauge
See DROPS video: How to make a gauge tension swatch
Why is the pattern worked top-down?
Working a garment top-down provides more flexibility and room for personal adjustment. For example it is easier to try the garment on while working, as well as making adjustments to length of yoke and shoulder caps.
The instructions are carefully explaining every step, in the correct order. Diagrams are adjusted to the knitting direction and are worked as usual.
How do I work according to a knitting diagram?
The diagram depicts all rows/rounds, and every stitch seen from the right side. It is read from bottom to top, from right to left. 1 square = 1 stitch.
When working back and forth, every other row is worked from the right side and every other row is worked from the wrong side. When working from the wrong side, the diagram will have to be worked reversed: from left to right, knit stitches are purled, purl stitches are knit etc.
When working in the round every round is worked from the right side and the diagram are worked from right to left on all rounds.
See DROPS lesson: How to read knitting diagrams
How do I work according to a crochet diagram?
The diagram depicts all rows/rounds, and every stitch seen from the right side. It is worked from bottom to top, from right to left.
When working back and forth every other row is worked from the right side: from right to left and every other row is worked from the wrong side: from left to right.
When working in the round, every row in the diagram are worked from the right side, from right to left.
When working a circular diagram you start in the middle and work your way outwards, counter clockwise, row by row.
The rows usually start with a given number of chain stitches (equivalent to the height of the following stitch), this will either be depicted in the diagram or explained in the pattern.
See DROPS lesson: How to read crochet diagrams
How do I work several diagrams simultaneously on the same row/round?
Instructions for working several diagrams after each other on the same row/round, will often be written like so: “work A.1, A.2, A.3 a total of 0-0-2-3-4 times". This means you work A.1 once, then A.2 is worked once, and A.3 is repeated (in width) the number of times provided for your size – in this case like so: S = 0 times, M = 0 times, L=2 times, XL= 3 times and XXL = 4 times.
The diagrams are worked as usual: begin with the first row in A.1, then work the first row in A.2 etc.
See DROPS lesson: How to read knitting diagrams
See DROPS lesson: How to read crochet diagrams
Why are the sleeves shorter in larger sizes?
The total width of the garment (from wrist-to-wrist) will be larger in the larger sizes, despite the actual sleeves being shorter. The larger sizes have longer sleeve caps and wider shoulders, so there will be a good fit in all sizes.
Where on the garment is the length measured?
The measurement sketch/schematic drawing provides information regarding the full length of the garment. If it’s a jumper or a jacket the length is measured from the highest point on the shoulder (usually closest to the neckline), and straight down to the bottom of the garment. It is NOT measured from the tip of shoulder. Similarly, the length of yoke is measured from the highest point on the shoulder and down to where yoke is split into body and sleeves.
See DROPS lesson: How to read a schematic drawing
What is a repeat?
Diagrams are often repeated on the round or in height. 1 repeat is the diagram the way it appears in the pattern. If it says to work 5 repeats of A.1 in the round, then you work A.1 a total of 5 times after/next to each other in the round. If it says to work 2 repeats of A.1 vertically/in height you work the entire diagram once, then begin again at the start and work the entire diagram one more time.
Why does the piece start with more chain stitches than it’s worked with?
Chain stitches are slightly narrower than other stitches and to avoid working the cast-on edge too tight, we simply chain more stitches to begin with. The stitch count will be adjusted on the following row to fit the pattern and measurement sketch.
Why increase before the rib edge when the piece is worked top-down?
The rib edge is more elastic and will contract slightly compared to, for example, stocking stitch. By increasing before the rib edge, you avoid a visible difference in width between the rib edge and the rest of the body.
Why increase in the cast-off edge?
It’s very easy to cast off too tightly, and by making yarn overs while casting off (and simultaneously casting these off) you avoid a too tight cast off edge.
See DROPS video: How to bind off with yarn overs (yo)
How do I increase/decrease on every 3rd and 4th row/round alternately?
To achieve an even increase (or decrease) you can increase on, for example: every 3rd and 4th row alternately, like so: work 2 rows and increase on the 3rd row, work 3 rows and increase on the 4th. Repeat this until the increase is complete.
See DROPS lesson: Increase or decrease 1 st on every 3rd and 4th row alternately
How can I work a jacket in the round instead of back and forth?
Should you prefer to work in the round instead of back and forth, you may of course adjust the pattern. You’ll need to add steeks mid-front (usually 5 stitches), and follow the instructions. When you would normally turn and work from the wrong side, simply work across the steek and continue in the round. At the end you’ll cut the piece open, pick up stitches to work bands, and cover the cut edges.
See DROPS video: How to knit steeks and cut open
Can I work a jumper back and forth instead of in the round?
Should you prefer to work back and forth instead of in the round, you may of course adjust the pattern so you work the pieces separately and then assemble them at the end. Divide the stitches for the body in 2, add 1 edge stitch in each side (for sewing) and work the front and back pieces separately.
See DROPS lesson: Can I adapt a pattern for circular needles into straight needles?
Why is the pattern slightly different than what I see in the photo?
Pattern repeats can vary slightly in the different sizes, in order to get the correct proportions. If you’re not working the exact same size as the garment in the photo, yours might deviate slightly. This has been carefully developed and adjusted so that the complete impression of the garment is the same in all sizes.
Make sure to follow instructions and diagrams for your size!
How do I make a women’s size garment into a men’s size one?
If you have found a pattern you like which is available in women’s size it’s not very difficult to convert it to men’s size. The biggest difference will be the length of sleeves and body. Start working on the women size that you think would fit across the chest. The additional length will be worked right before you cast off for the armhole/sleeve cap. If the pattern is worked top-down you can add the length right after the armhole or before the first decrease on sleeve.
Regarding additional yarn amount, this will depend on how much length you add, but it is better with a skein too many than too few.
How do I prevent a hairy garment from shedding?
All yarns will have excess fibres (from production) that might come off as lint or shedding. Brushed yarns (ie hairier yarns) have more of these loose, excess fibres, causing more shedding.
Shedding also depends on what is worn under or over the garment, and whether this pulls at the yarn fibres. It’s therefore not possible to guarantee that there will be no shedding
Below are some tips on how to get the best result when working with hairier yarns:
1. When the garment is finished (before you wash it) shake it vigorously so the looser hairs come off. NOTE: do NOT use a lint roller, brush or any method that pulls at the yarn.
2. Place the garment in a plastic bag and put it in your freezer - the temperature will cause the fibres to become less attached to each other, and excess fibres will come off easier.
3. Leave in the freezer for a few hours before taking it out and shaking it again.
4. Wash the garment according to the instructions on the yarn label.
Why does my garment pill?
Pilling is a natural process that happens to even the most exclusive of fibers. It's a natural sign of wear and tear that is hard to avoid, and that is most visible in high friction areas of your garment like a sweater's arms and cuffs.
You can make your garment look as new by removing the pilling, using a fabric comb or a pill/lint remover.
Tangled Willows |
||||||||||||||||
|
|
|||||||||||||||
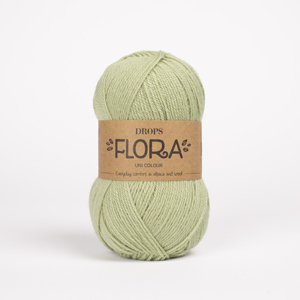
Knitted sweater in DROPS Flora and DROPS Kid-Silk or DROPS Alaska. Piece is worked with raglan and cables. Size: S - XXXL
DROPS 226-41 |
||||||||||||||||
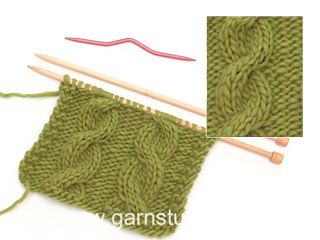
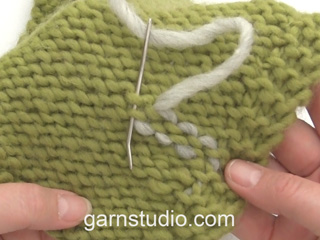
---------------------------------------------------------- EXPLANATION FOR THE PATTERN: ---------------------------------------------------------- PATTERN: See diagrams A.1 to A.7. Diagrams show all rows in pattern seen from the right side. INCREASE/DECREASE TIP (evenly): To calculate how to increase/decrease evenly, use total number of stitches (i.e. 242 stitches) and divide with number of increases/decreases to be done (e.g. 38) = 6.4. In this example decrease by knitting alternately approx. every 5th and 6th stitch and every 6th and 7th stitch together. When increasing make 1 yarn over after alternately approx. every 6th and 7th stitch. Knit yarn overs twisted on next round to avoid holes. RAGLAN: Decrease 1 stitch on each side of marker thread in every transition between body and sleeves (= 8 stitches decreased on round) as follows: Work until 3 stitches remain before marker thread, knit 2 together, knit 2 (marker thread is in the middle of these 2 stitches), slip 1 stitch knitwise, knit 1, pass slipped stitch over stitch worked. NOTE: When there is no longer room for one entire cable towards raglan decrease, work cable stitches in stockinette stitch. INCREASE TIP (applies to mid under sleeves): Increase 1 stitch on each side of the stitch with marker as follows: Work to the stitch with marker, make 1 yarn over, work 1 stitch (stitch with marker), make 1 yarn over. On next round knit yarn overs twisted and then in pattern A.1. KNITTING TIP: When binding off for armholes on body and sleeves, adjust so that this is done on the same round in pattern marked with A.x (single cables). This is to plait all the cables on the same round in pattern when continuing. ---------------------------------------------------------- START THE PIECE HERE: ---------------------------------------------------------- SWEATER - SHORT OVERVIEW OF THE PIECE: Work body in the round on circular needle, from the bottom and up to armholes. Then work sleeves in the round on double pointed needles/a short circular needle up to armholes. Then slip sleeves on to same circular needle as body. Work yoke in the round on circular needle. BODY: Cast on 224-232-250-264-292-314 stitches on circular needle size 4 MM = US 6 with 1 strand DROPS Flora and 1 strand DROPS Kid-Silk (= 2 strands) or 1 strand DROPS Alaska. Work rib in the round (= knit 1/purl 1) until piece measures 5 cm = 2". Switch to circular needle size 5, knit 1 round and decrease 20-20-22-24-24-26 stitches evenly – read INCREASE/DECREASE TIP in explanation above = 204-212-228-240- 268-288 stitches. Then work according to diagram as follows: * Work A.1 over 20-24-32-38-30-40 stitches, A.2 over 11-11-11-11-22-22 stitches (= 1-1-1-1-2-2 repetitions of 11 stitches), A.3 (= 9 stitches), A.4 (= 42 stitches), A.5 (= 9 stitches), A.6 over 11-11-11-11-22-22 stitches (= 1-1-1-1-2-2 repetitions of 11 stitches) *, work from *-* 2 times in total. Insert a marker in the middle of the stitches worked in pattern A.1 (20-24-32-38-30-40 stitches with A.1 on each side of each marker). REMEMBER THE KNITTING GAUGE! Work with pattern like this until piece measures approx. 20-24-32-38-30-40 cm = 8"-9½"-12½"-15"-11¾"-15¾" from cast-on edge - read KNITTING TIP! On next round bind off 3-3-4-4-5-5 stitches on each side of each marker (= 6-6-8-8-10-10 stitches in each side) for armholes. There are now 96-100-106-112-124-134 stitches on front piece and on back piece. Put piece aside and work the sleeves. SLEEVES: Cast on 48-48-50-50-52-54 stitches on double pointed needles size 4 MM = US 6 with 1 strand DROPS Flora and 1 strand DROPS Kid-Silk (= 2 strands) or 1 strand DROPS Alaska. Work rib in the round (= knit 1/purl 1) until piece measures approx. 5 cm = 2". Switch to double pointed needles size 5 MM = US 8, and knit 1 round and increase 6-6-6-8-8-8 stitches evenly = 54-54-56-58-60-62 stitches. Insert 1 marker in the first stich of the round, use this marker later when increasing stitches mid under sleeve. Then work according to diagram as follows: Work A.1 over 9-9-10-11-12-13 stitches, work A.3 (= 9 stitches), A.7 (= 18 stitches), A.5 (= 9 stitches), and work A.1 over the last 9-9-10-11-12-13 stitches. When piece measures approx. 8-8-8-8-7-7 cm = 3⅛"-3⅛"-3⅛"-3⅛"-2¾"-2¾" from cast-on edge, increase 1 stitch on each side of marker - read INCREASE TIP in explanation above. Repeat increase approx. every 5-4-2½-2½-2½-2 cm = 2"-1½"-1"-1"-1"-¾" 6-8-11-11-13-15 times in total = 66-70-78-80-86-92 stitches. Work until piece measures approx. 39-38-37-36-35-33 cm = 15¼"-15"-14½"-14¼"-13¾"-13" from cast-on edge - remember KNITTING TIP! Bind off 6-6-8-8-10-10 stitches mid under sleeve (3-3-4-4-5-5 on each side of marker under sleeve) = 60-64-70-72-76-82 stitches. Put piece aside, and knit another sleeve the same way, but insert the marker mid under sleeve in the last stitch of the round. YOKE: Slip sleeves on to same circular needle as body where armholes were bind off = 312- 328-352-368-400-432 stitches. Insert 1 marker thread in every transition between sleeves and body. Now work the 2 stitches that are on each side of every marker thread in stockinette stitch, work the remaining stitches in pattern as before. Work pattern as before until piece measures 3-3-1-3-1-1 cm = 1⅛"-1⅛"-⅜"-1⅛"-⅜"-⅜" from the place where pieces were put together. Continue in pattern as before and begin decrease for RAGLAN – read explanation above. Decrease like this every other round 22-24-27-28-32-34 times in total. When all decreases for raglan are done, there are 136-136-136-144-144-160 stitches on round, and yoke measures approx. 23-25-26-28-30-32 cm = 9"-9¾"-10¼"-11"-11¾"-12½" from where piece was put together. On next round work pattern as before but knit over cables in pattern and decrease stitches evenly as follows: Decrease 6 stitches over cables on front piece, decrease 3 stitches over cables on first sleeve, decrease 6 stitches over cables on back piece and decrease 3 stitches over cables on last sleeve = 118-118-118-126-126-142 stitches. Knit 1 round and decrease 36-32-30-38-34-46 stitches evenly on round = 82-86-88-88-92-96 stitches. Piece measures approx. 54-56-58-60-62-64 cm = 21¼"-22"-22¾"-23⅝"-24⅜"-25¼" from shoulder and down. NECK EDGE: Switch to a short circular needle size 4 MM = US 6 and work rib = knit 1/purl 1 until rib measures approx. 11 cm = 4⅜". Loosely bind off stitches with knit over knit and purl over purl. ASSEMBLY: Sew the opening under the sleeves. Fold the neck edge down on the right side. |
||||||||||||||||
Diagram explanations |
||||||||||||||||
|
||||||||||||||||
Have you made this or any other of our designs? Tag your pictures in social media with #dropsdesign so we can see them! Do you need help with this pattern?You'll find tutorial videos, a Comments/Questions area and more by visiting the pattern on garnstudio.com. © 1982-2024 DROPS Design A/S. We reserve all rights. This document, including all its sub-sections, has copyrights. Read more about what you can do with our patterns at the bottom of each pattern on our site. |
With over 40 years in knitting and crochet design, DROPS Design offers one of the most extensive collections of free patterns on the internet - translated to 17 languages. As of today we count 304 catalogs and 11422 patterns - 11417 of which are translated into English (US/in).
We work hard to bring you the best knitting and crochet have to offer, inspiration and advice as well as great quality yarns at incredible prices! Would you like to use our patterns for other than personal use? You can read what you are allowed to do in the Copyright text at the bottom of all our patterns. Happy crafting!
Comments / Questions (28)
Anna wrote:
Klopt de stekenverhouding wel? Ik moet naar 6mm gaan om 18ste op de 10 cm te krijgen en dan wordt het heel los rommelig en 1 grote gatenkaas. Heb nu 21ste op de 10 cm op 5mm naalden
08.03.2024 - 18:55DROPS Design answered:
Dag Anna,
Dat zou best kunnen dat je grotere naalden nodig hebt. Per persoon is dat verschillend. Als Kid-Silk en Flora combineert, heb je dan wel 1 draad van elke kwaliteit genomen? Dus dat je met 2 draden uit garengroep A breit?
08.03.2024 - 20:00Marián wrote:
Buenos días, he empezado a hacer este jersey comenzando por el cuerpo de abajo a arriba y me sorprende que el cuerpo hasta la sisa solo mida 26 cm. Es muy corto y tampoco se corresponde con la foto del modelo. En 26 cm entra el elástico y algo más de dos diagramas de 24 vueltas cada uno. Estoyequivocada y lo he interpretado mal? Muchísimas gracias Marián
07.03.2024 - 10:50DROPS Design answered:
Hola Marián, en la foto no se aprecia pero en el esquema puedes ver que la sisa es más larga de lo habitual, 24 cm en vez de 18cm. Por eso se comienza más pronto la sisa. El largo total de la prenda es 52cm y no llega a la cadera, como se ve en la foto. Puedes alargar la labor aumentando la sección del cuerpo antes de empezar la sisa, pero después tendrás que trabajar la sisa de 24cm así que tienes que calcular el largo final deseado teniendo esto en cuenta. Ten en cuenta que la tensión indicada es con punto jersey; es posible que el patrón de trenzas se encoja en vertical por lo que entran más que 2 repeticiones completas de los diagramas.
10.03.2024 - 23:04Terri Rawls wrote:
Are the length of the sleeves going to shorter in the larger sizes than in the smaller sizes? I’m making a size XL and the lengths are shorter than the smaller sizes. Ami reading that correctly?
28.01.2024 - 04:57DROPS Design answered:
Dear Terri, the sleeves are shorter in the larger sizes because the shoulders are wider and the yoke is longer, so as to compensate for these measurements. Happy knitting!
29.01.2024 - 00:02Outi wrote:
Voiko ohjeen mitat pitää paikkansa. Hihan aukko jätetään 27cm korkeudessa.
25.01.2024 - 08:47DROPS Design answered:
Kyllä, koossa L kädentie alkaa, kun työn korkeus on 27 cm.
25.01.2024 - 17:27Verena wrote:
Damit die Muster in der größten Größe aufgeht, muss man A1 über 40 Maschen machen und nicht wie in der Anleitung beschrieben über 34 maschen. Denn dann passt es auch mit dem nächsten Absatz zusammen!!!
19.01.2024 - 14:52Katrin wrote:
Kas tõesti keha pikkus 26 cm ja juba käeauk? See jääb liiga lühike minu arvates.
07.11.2023 - 09:17DROPS Design answered:
Tere Katrin! Alati võib kududa pikema vastavalt oma mõõtudele! Head kudumist!
09.11.2023 - 22:35Dag wrote:
Hei Jeg har laget en pdf der jeg har satt sammen både mønster til bole og mønster til arm slik at de har samme format( i det man printer ut har flettene i A2,3,5 og 6 annet format enn A4 og A7. Med mine PDF får man en fullstendig mønsterrad og og kan følges linje for linje gjennom hele arbeidet. hvor skal jeg sende det, finner ingen mailadresse til Dropsdesign . Send meg en mailadresse;-)
05.11.2023 - 15:54Adele wrote:
What row on A.x do I cast off?
14.02.2023 - 13:33DROPS Design answered:
Oh do you refer to the KNITTING TIP? It just means you have to note which row of the cable you are casting off on body, and make sure you will cast off on the same row on sleeves, so that cables will then be worked on the same round, but depending on your tension in height (and your size) the round may vary. Happy knitting!
14.02.2023 - 14:01Rikke Nielsen wrote:
Lukke af til ærmegab efter 26 cm?? Er det ikke en skrivefejl?? Tænker nærmere 46cm??
13.02.2023 - 22:42DROPS Design answered:
Hej Rikke, du finder målene i måleskitsen nederst i opskriften. Her kan du se at ærmegabet er ret stort, så målet kommer til at stemme med total længde. Vælg den størrelse og mål som passer dig :)
14.02.2023 - 09:59Adele wrote:
When casting off for the armholes, what row of chart for the single cables do I decrease on? Is it when I do the actual cable? Many thanks
13.02.2023 - 17:20DROPS Design answered:
Dear Adele, you will cast off in the cables for the armholes, you cast off on body the 3-3-4-4-5-5 sts on each side of marker (= 6-6-8-8-10-10 sts on each side of piece), these stitches are worked in A.1, not with the cables. Or do I misunderstand what you are meaning here? Can you then tell us more? Thanks for your comprehension.
14.02.2023 - 13:30